Introduction
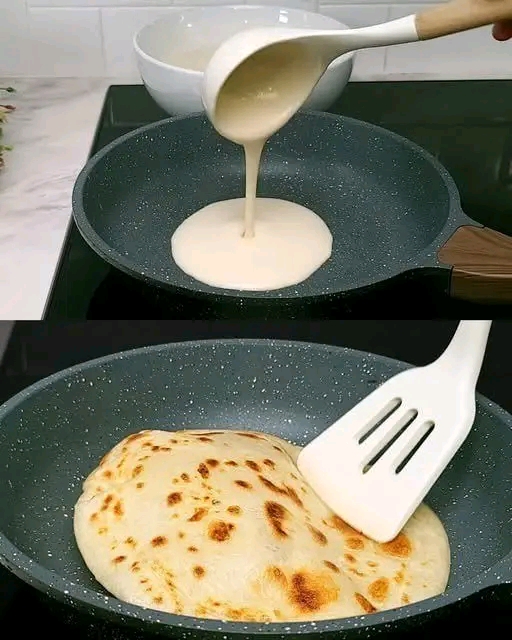
Have you ever seen bread puff up like a balloon right before your eyes? This incredible homemade flatbread is simple, fun, and surprisingly satisfying to make! With just flour and water, you can create beautiful, hollow bread pockets that inflate while cooking in a hot pan or oven.
The best part? You don’t need yeast, baking powder, or hours of waiting for dough to rise. This recipe is perfect for beginners, busy mornings, or anyone who loves discovering simple traditional bread-making techniques.
The secret is in the dough’s consistency, the way it is rolled, and the high heat that turns the moisture inside into steam. When everything comes together correctly, the bread separates into two thin layers and puffs up like a little balloon!
Ingredients
You only need a few basic ingredients to get started.
- 2 cups (250 g) all-purpose flour
- Approximately ¾ cup (180 ml) warm water, added gradually
- ½ teaspoon salt (optional)
- A little extra flour for dusting
Important: The traditional two-ingredient version uses only flour and water. Salt is optional and can be omitted if you want to keep the recipe as simple as possible.
Instructions
Step 1: Prepare the Dough
Place the flour in a large mixing bowl. Slowly pour in the warm water while mixing with a spoon or your hands.
Continue adding water little by little until the flour comes together into a soft dough. The dough should be moist enough to hold together but not so sticky that it coats your hands excessively.
If you are using salt, mix it into the flour before adding the water.
Step 2: Let the Dough Rest
Cover the dough with a clean kitchen towel or place it in a covered bowl. Let it rest for approximately 20–30 minutes.
Although this recipe contains no yeast, resting allows the flour to absorb the water and helps the dough become easier to roll.
Step 3: Divide the Dough
Lightly dust your work surface with flour. Divide the dough into 6–8 equal pieces and shape each piece into a small ball.
Keep the unused dough covered so it does not dry out while you work.
Step 4: Roll the Dough Thinly
Using a rolling pin, roll each dough ball into a thin, even circle, approximately 5–6 inches (12–15 cm) in diameter.
Try to avoid thick edges, cracks, holes, or uneven patches. A reasonably uniform thickness helps the bread inflate more successfully.
Do not use too much extra flour, because excess dry flour can make the surface harder to cook evenly.
Step 5: Heat the Pan or Oven
For the pan method, preheat a heavy skillet over medium-high to high heat. The pan should be hot before the dough goes in.
For more dramatic puffing, you can also use a fully preheated oven at approximately 475–500°F (245–260°C), provided your baking equipment is suitable for that temperature.
Step 6: Cook and Watch It Puff!
Place one rolled dough circle onto the hot, dry skillet.
Cook for approximately 30–60 seconds, then flip it when small bubbles begin to appear. Continue cooking and gently turn it as needed.
As steam builds inside the dough, the two layers may separate, causing the bread to swell like a balloon.
If the bread does not puff completely, don’t worry. It can still be delicious and soft enough to serve with your favorite meals.
Step 7: Serve Warm
Remove the bread from the pan and place it under a clean kitchen towel to keep it warm and soft.
Repeat with the remaining dough circles. Serve immediately for the best texture.
Methods of Preparation
Method 1: Stovetop Balloon Bread
This is the simplest method for everyday cooking.
- Heat a heavy skillet until very hot.
- Place one thin dough circle in the dry pan.
- Flip when bubbles begin to form.
- Continue cooking until the bread puffs and develops light golden spots.
- Remove and cover with a towel.
Tip: The pan must be hot enough to create steam quickly, but the bread should not burn before it has time to inflate.
Method 2: Oven-Baked Balloon Bread
- Preheat the oven to 475–500°F (245–260°C).
- Place an oven-safe baking tray or baking stone inside while it heats.
- Carefully place the thin dough circles on the hot surface.
- Bake for a few minutes, watching closely as the bread begins to puff.
- Remove once inflated and lightly cooked.
Oven temperatures and baking times vary, so watch the bread carefully and use oven-safe equipment.
Method 3: Serving It as a Filled Pocket
Once the bread cools slightly, you can gently open the hollow center and fill it with:
- Grilled chicken and fresh vegetables
- Eggs and cheese
- Hummus and cucumber
- Roasted vegetables
- Tuna salad
- Falafel and yogurt sauce
This makes the bread suitable for breakfast, lunch, dinner, or a quick snack.
The Secret Behind the Balloon Effect
Why does this bread inflate without yeast?
The answer is steam, not yeast!
When the thin dough hits a very hot cooking surface, the moisture inside heats rapidly and turns into steam. The steam creates pressure between the dough’s outer layers, separating them and causing the bread to puff.
Three things are especially important:
- Thin, even rolling: Helps the dough cook consistently.
- High heat: Creates steam quickly enough to separate the layers.
- A smooth dough surface: Reduces the chance of steam escaping through holes or cracks.
There is no need for yeast to produce this effect. However, not every piece will inflate perfectly, especially if the dough is rolled unevenly or the cooking surface is not hot enough.
History of Balloon Bread
Puffed flatbreads have a long history across several regions of the world. Similar breads are found in Middle Eastern, Mediterranean, North African, and South Asian food traditions.
Pita bread is one familiar example of bread that can form a hollow pocket during baking. Other traditional flatbreads use different ingredients, cooking techniques, and dough preparations to achieve their characteristic textures.
Simple flour-and-water doughs have also been used for generations because they require inexpensive, widely available ingredients.
Although this particular recipe is a simplified home version, it draws on the same basic principle used in many traditional breads: heat transforms moisture into steam, helping the dough expand.
Benefits of This Recipe
1. Simple Ingredients
Flour and water are enough to make the basic dough, making this an economical option for homemade bread.
2. No Yeast Required
You don’t have to buy yeast or wait for a traditional yeast dough to rise.
3. Beginner-Friendly
The recipe uses straightforward steps and provides a fun way to learn about dough preparation and cooking temperatures.
4. Versatile for Meals
You can serve the bread alongside soups, salads, grilled foods, eggs, or vegetable dishes.
5. Easy to Customize
Add optional salt for flavor, or experiment with different fillings after cooking.
6. Homemade Freshness
Making bread at home allows you to control the ingredients and adjust the portions to suit your needs.
7. A Fun Cooking Experience
Watching the bread puff up can be especially enjoyable for families and anyone who likes experimenting in the kitchen.
Nutrition note: The bread’s nutritional value depends on the type of flour, portion size, and what you serve with it. It is primarily a source of carbohydrates, and whole-wheat flour can provide more fiber than refined all-purpose flour.
Formation: How the Dough Becomes a Balloon
The transformation happens in a few simple stages.
Stage 1: Hydration
Water combines with flour to create a cohesive dough.
Stage 2: Resting
The flour absorbs moisture, making the dough easier to roll.
Stage 3: Thin Rolling
The dough becomes a thin sheet that can heat quickly and evenly.
Stage 4: Steam Formation
The moisture inside the dough turns into steam when exposed to intense heat.
Stage 5: Layer Separation
The steam pushes the two sides apart, creating a hollow space.
Stage 6: Balloon Effect
The bread expands dramatically, producing the familiar balloon-like appearance.
Once removed from the heat, the bread may slowly deflate. This is completely normal and does not mean the recipe has failed.
Common Mistakes to Avoid
- The pan is not hot enough: The bread may cook slowly without puffing.
- The dough is too thick: Heat may not reach the center quickly enough to create a good pocket.
- The dough is too dry: Cracks can allow steam to escape.
- The dough is too sticky: It can be difficult to roll into a smooth circle.
- The surface has holes: Steam may escape before the bread inflates.
- The bread is left unattended: High heat can burn the dough quickly.
For the best results, experiment with one piece first. Adjust the heat and thickness before cooking the remaining portions.
Conclusion
Who knew that flour and water could create something so fascinating?
This easy balloon bread is proof that simple ingredients and the right technique can produce wonderful results. With no yeast, no complicated equipment, and no lengthy rising time, it is a fun recipe to try whenever you want fresh homemade bread.
Remember the three keys to success: make a smooth dough, roll it evenly, and cook it on a properly heated surface.
Even if your bread doesn’t puff up perfectly on the first try, you can still enjoy a delicious homemade flatbread that pairs beautifully with countless dishes.
Give this recipe a try and see the magic happen in your own kitchen!