Introduction
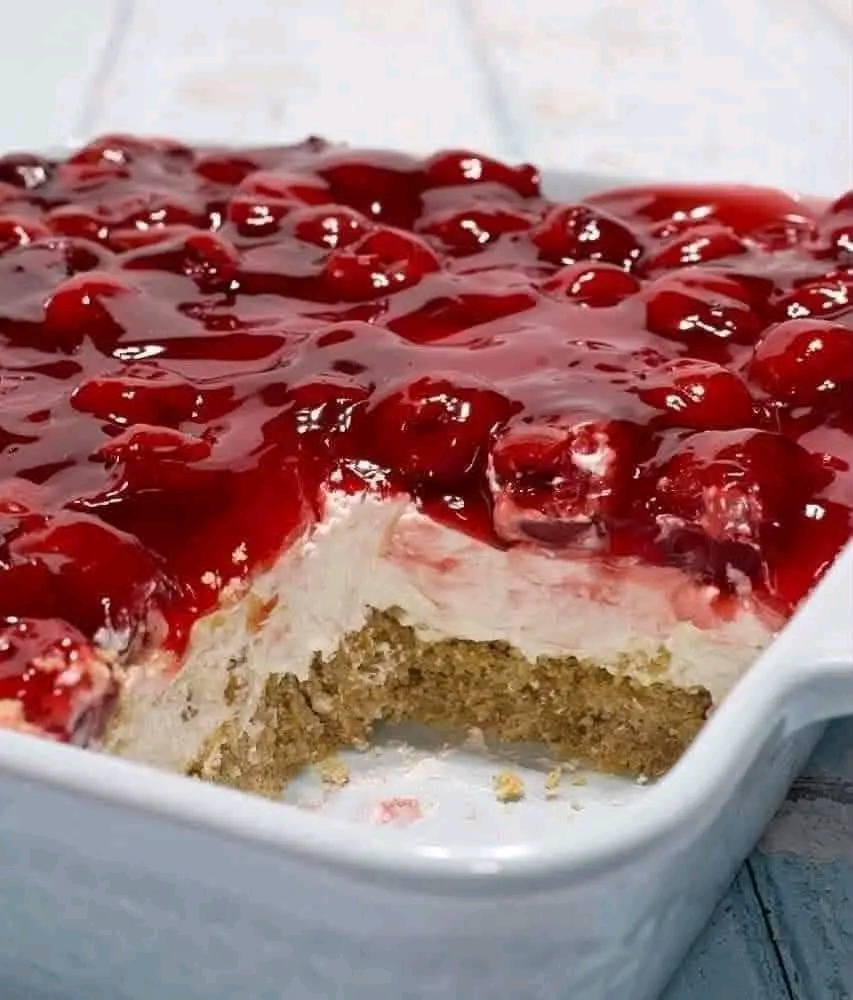
This is the dessert in your photo: a buttery graham cracker crust, a thick layer of fluffy cream cheese filling, and glossy cherry topping. It needs no oven, only a fridge, and it’s easy enough for beginners.
Serves: 9-12 | Prep: 20 min | Chill: 4+ hours | Pan: 8×8 or 9×9 in (20-23 cm)
Ingredients
Crust
- 2 cups (200 g) graham cracker crumbs, or digestive biscuits
- ½ cup (115 g) melted butter
- ¼ cup (50 g) sugar
Cream filling
- 8 oz (225 g) cream cheese, softened
- 1 cup (120 g) powdered sugar
- 1 tsp vanilla extract
- 8 oz (225 g) whipped topping, or 1½ cups heavy cream whipped to stiff peaks
Topping
- 1 can (21 oz / 600 g) cherry pie filling
- Optional: lemon zest, or a few fresh cherries
Instructions
- Make the crust. Mix the crumbs, sugar and melted butter until they look like wet sand.
- Press it in. Press the mixture firmly and evenly into the pan, using the bottom of a glass. Chill for 15 minutes.
- Beat the cream cheese. Beat the softened cream cheese, powdered sugar and vanilla until completely smooth, with no lumps.
- Fold in the cream. Gently fold in the whipped topping or whipped cream with a spatula. Don’t stir hard, or you’ll lose the airiness.
- Layer. Spread the filling over the crust in an even layer, smoothing the top.
- Top. Spoon the cherry pie filling over the cream, covering it edge to edge.
- Chill. Refrigerate at least 4 hours, ideally overnight, so it sets cleanly.
- Serve. Cut with a warm knife and lift out with a spatula.
Methods and Tips
- Soft cream cheese is key. Leave it out for 30-60 minutes, or lumps will show.
- Clean slices: Dip the knife in hot water and wipe it between cuts.
- Firmer filling: Use stiffly whipped cream, or add a spoonful of mascarpone.
- Crust variations: Use crushed Oreos, shortbread, or add a pinch of cinnamon.
- Topping variations: Strawberry, blueberry or peach pie filling all work.
- Storage: Covered in the fridge for up to 4 days. Freezing is possible, but the texture gets softer.
Formation (How the Layers Come Together)
Each layer has a job:
- Crust: Butter acts as the glue, hardening as it chills.
- Filling: The cream cheese and whipped cream stiffen in the cold, so it holds its shape without baking or gelatin.
- Topping: The thick pie filling stays on top without soaking through.
History
Desserts like this belong to the American “icebox” tradition, which grew in the early 1900s as home refrigerators became common. Cream cheese was first made in the US in the 1870s, and graham crackers date back to the 1820s-30s. Combined, they became the classic base for cheesecake-style desserts. The no-bake version spread through mid-century community cookbooks and potluck culture because it’s cheap, fast and reliable. The exact origin of this particular recipe isn’t documented, as it grew from home cooks rather than one inventor.
Benefits
Honestly, this is a treat, not a health food, but it has some upsides:
- No oven or special skills needed.
- Make-ahead: Ideal for gatherings.
- Cherries provide some antioxidants and vitamin C.
- Cream cheese adds a little protein and calcium.
- Portions are easy to control by cutting smaller squares.
For a lighter version, use light cream cheese, reduced-sugar pie filling and less butter in the crust.
Who Loves It
- Kids and anyone with a sweet tooth
- Hosts who want a stress-free dessert for holidays, Eid, birthdays and picnics
- Cheesecake fans who don’t want to bake
- Beginners looking for a first success
Serve with coffee, mint tea or a glass of cold milk.
Conclusion
This dessert combines crunch, cream and fruit in one pan, with very little effort. Make it the night before, and you’ll have a creamy, impressive dessert that looks just like the photo.
Want a version with strawberries, a chocolate crust, or smaller portions in cups?