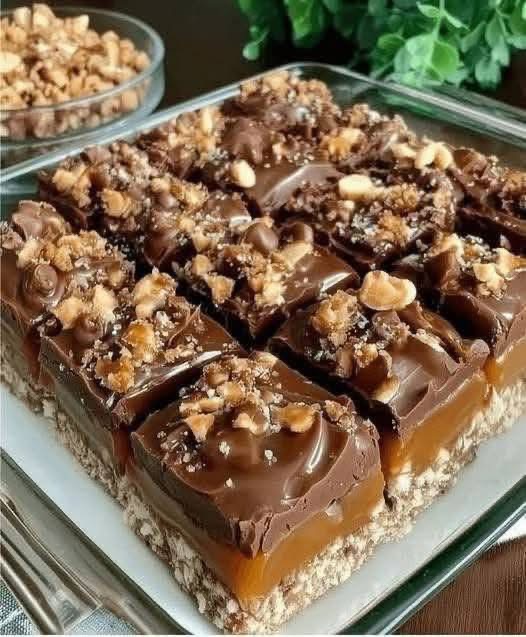
These homemade crunch bars are a simple, crispy and chocolatey treat made with onlyfive ingredients. No oven is needed: just melt, mix, press, chill and cut. They are perfect for an afternoon snack, a lunchbox treat, a party dessert, or a homemade gift for chocolate lovers.
🛒 Ingredients
For approximately 12–16 bars:
- 300 g milk or dark chocolate
- 60 g unsalted butter or coconut oil
- 80 g crispy rice cereal
- 60 g smooth peanut butter
- 2 tablespoons honey or maple syrup
Optional decoration
- Melted chocolate for drizzling
- Chopped nuts
- A pinch of flaky sea salt
- Shredded coconut
Five essential ingredients: chocolate, butter/coconut oil, crispy rice cereal, peanut butter, and honey/maple syrup.
👩🍳 Instructions
1. Prepare the pan
Line a square baking pan, approximately 20 × 20 cm, with parchment paper. Leave a little paper hanging over the sides so the finished bars are easy to remove.
2. Melt the chocolate
Break the chocolate into small pieces and place itin a heatproof bowl. Add the butter or coconut oil.
Melt gently over a pan of barely simmering water, stirring occasionally, until smooth.
You can also microwave it in short 15–20 second intervals, stirring between each interval.
3. Add the peanut butter
Remove the chocolate mixture from the heat. Stir in the peanut butter and honey or maplesyrup until everything is completely smooth.
4. Add the crunch
Pour the crispy rice cereal into the chocolate mixture.
Fold gently with a spatula until all the cereal is coated in chocolate. Avoid crushing the cereal—you want to keep those little pockets of crunch.
5. Form the bars
Transfer the mixture to the prepared pan.
Press it down firmly and evenly with the backof a spatula or a piece of parchment paper.
The more firmly you press, the easier the barswill be to cut.
6. Chill
Place the pan in the refrigerator for 1–2 hours, or until the chocolate has completely hardened.
7. Cut and serve
Lift the chilled slab from the pan using theparchment paper.
Cut it into squares or rectangular bars with a sharp knife.
Your homemade crunch bars are ready! 🍫✨
🍫 The Method in Simple Form
Melt → Mix → Crunch → Press → Chill → Cut → Enjoy
This recipe doesn’t require baking becausethe chocolate acts as the main structure that holds the crispy cereal together once it sets.
🕰️ A Little History
Chocolate-and-crisped-rice treats became popular because they combine two contrasting textures: smooth chocolate and light, crunchy cereal.
Commercial chocolate bars featuring crisped ricehelped make this combination familiar around the world. Homemade versions became especially popular because they are inexpensive, require very little equipment, and can be customizedwith different chocolates, nuts and cereals.
The basic idea remains wonderfully simple: coat a crunchy ingredient with melted chocolate, allow it to set, and cut it into convenient pieces.
🌟 Benefits
These homemade bars can have some advantages over complicated desserts:
- No baking: You don’t need an oven.
- Only five main ingredients: The recipe is easy to remember.
- Quick preparation: Most of the work is simply melting and mixing.
- Customizable: You can use dark, milk orwhite chocolate.
- Portable: Once firm, the bars are convenientfor snacks and lunchboxes.
- Texture: Crispy cereal gives the chocolate a satisfying crunch.
Keep in mind that these are still a dessert, and chocolate, butter, peanut butter and honey can make them relatively high in calories andsugar. Enjoy them as an occasional treat.
🥜 Variations
Peanut Butter Crunch Bars
Use creamy peanut butter for a rich, nutty flavor.
Dark Chocolate Crunch Bars
Use 70% dark chocolate for a deeper, less sweet chocolate flavor.
Nutty Crunch Bars
Add 40–50 g of chopped almonds, hazelnuts or peanuts.
Coconut Crunch Bars
Add a few tablespoons of shredded coconut to the cereal mixture.
Salted Chocolate Crunch Bars
Sprinkle a tiny amount of flaky sea salt overthe top before chilling.
White Chocolate Version
Replace the dark or milk chocolate with white chocolate and add dried cranberries for a festive variation.
💡 Tips for Perfect Bars
- Don’t overheat the chocolate; gentle meltinggives a smoother result.
- Fold the cereal in carefully so it remains crispy.
- Press the mixture firmly into the pan.
- Chill until completely firm before cutting.
- For clean cuts, use a sharp knife warmed briefly under hot water and dried thoroughly.
- Store the bars in an airtight container.
❤️ For Chocolate Lovers
If you love the combination of chocolate + peanut butter + crunch, these bars are especially satisfying. They’re also great for making with children because there is no oven involved and the preparation is straightforward.
For a more luxurious version, drizzle the finishedbars with extra melted chocolate and sprinkle them with chopped roasted hazelnuts.
🎁 Homemade Gift Idea
Cut the bars into small rectangles, wrap each one in parchment paper, and place them in a decorative box or jar. They make a simplehomemade treat for birthdays, holidays, partiesor chocolate-loving friends.
❄️ Storage
Keep the bars in an airtight container.
- Refrigerator: approximately 1 week for the best texture.
- Freezer: they can be frozen in a well-sealed container for longer storage.
Allow frozen bars to soften slightly before serving.
📝 Quick Recipe Card
Prep: 10–15 minutes
Chilling: 1–2 hours
Baking: None
Yield: 12–16 bars
Ingredients: chocolate + butter/coconut oil + crispyrice cereal + peanut butter + honey/maple syrup.
Method: Melt the chocolate and fat → stir in peanut butter and honey → fold in crispy rice→ press into a lined pan → chill → cut.
🎉 Conclusion
These 5-ingredient homemade crunch bars prove that you don’t need an oven or a long ingredientlist to make an irresistible dessert. The chocolate provides richness, the crispy rice creates the crunch, and peanut butter adds a delicious nutty depth.
They’re quick, customizable and perfect forchocolate lovers of all ages. 🍫❤️