Introduction
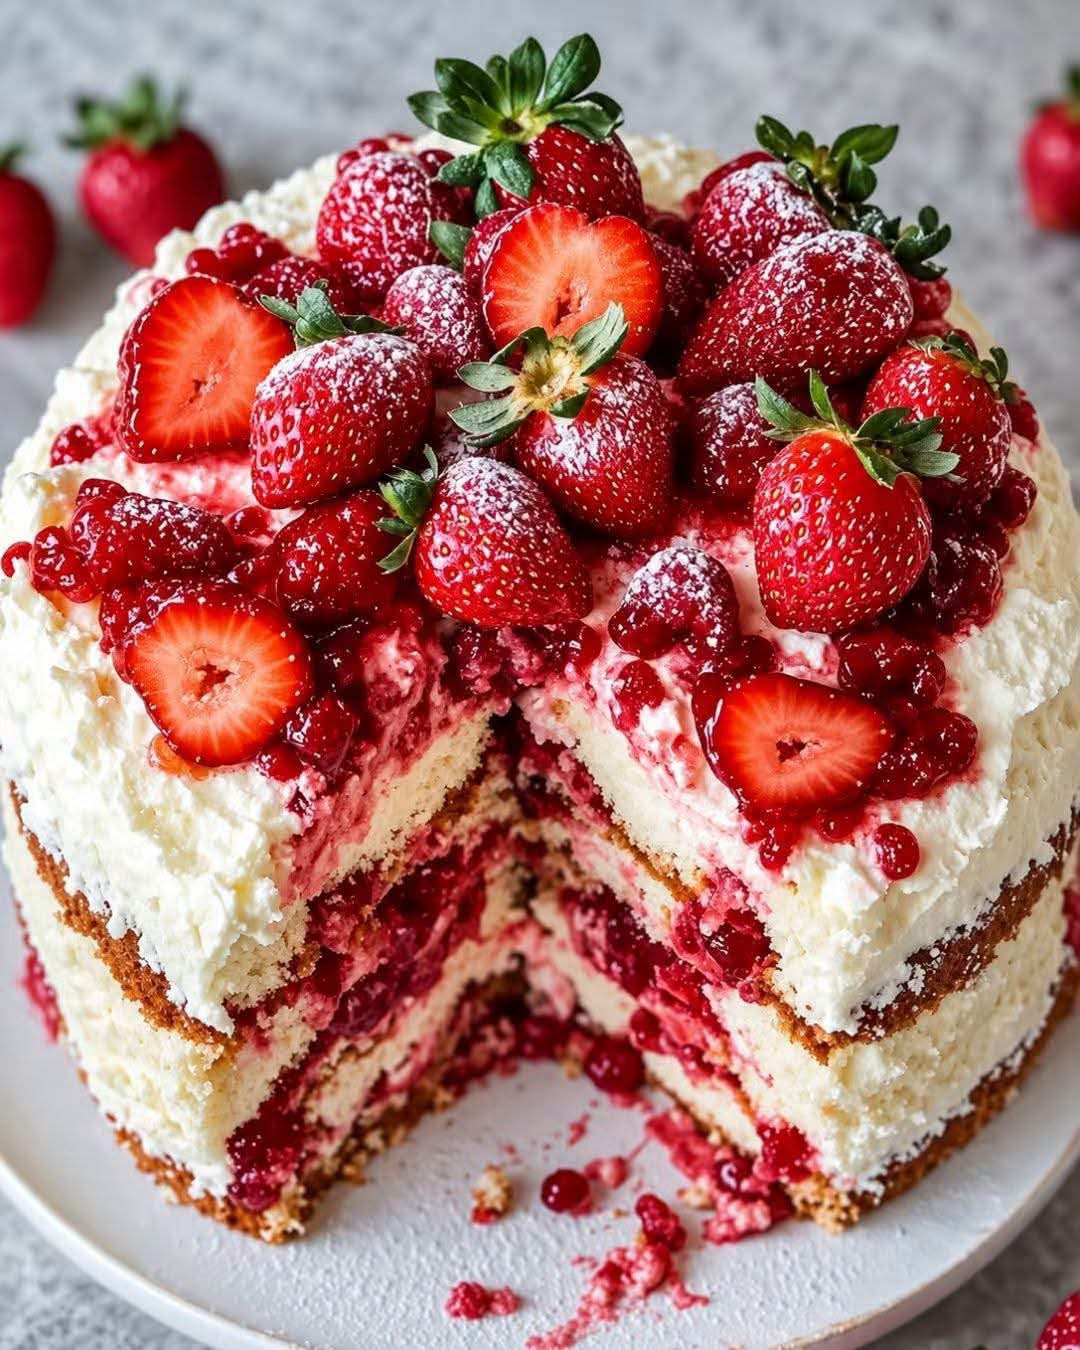
Get ready for a dessert that is as dramatic as it is delicious! Strawberry Earthquake Cake is a rich, soft strawberry cake filled with a creamy cheesecake-style layer that cracks and swirls beautifully as it bakes.
The name “earthquake cake” comes from its wonderfully imperfect appearance. As the cake bakes, the creamy filling sinks and moves through the strawberry batter, creating cracks, valleys, and delicious pockets throughout the cake.
Every slice offers a combination of moist strawberry cake, creamy cheesecake filling, sweet white chocolate, and juicy strawberries. It is an easy dessert that looks impressive without requiring complicated decorating skills.
🍓 Recipe Information
Recipe: Ultimate Strawberry Earthquake Cake
Preparation Time: 20 minutes
Baking Time: 40–50 minutes
Cooling Time: 45–60 minutes
Total Time: About 2 hours
Yield: 12–16 servings
Difficulty: Easy to Moderate
🛒 Ingredients
For the Strawberry Cake
- 1 box strawberry cake mix
- 3 large eggs
- ½ cup (120 ml) vegetable oil
- 1 cup (240 ml) milk
- 1 teaspoon vanilla extract
For the Cream Cheese Layer
- 8 oz (225 g) cream cheese, softened
- ½ cup (115 g) unsalted butter, softened
- 2 cups (240 g) powdered sugar
- 1 teaspoon vanilla extract
- Pinch of salt
For the Strawberry Filling
- 1 cup chopped fresh strawberries
- 2 tablespoons strawberry jam
- 1 tablespoon powdered sugar
For the Topping
- 1 cup white chocolate chips
- ½ cup shredded sweetened coconut, optional
- ½ cup chopped fresh strawberries
- Powdered sugar, optional
👩🍳 Instructions
Step 1: Prepare the Oven
Preheat your oven to 175°C (350°F).
Grease a 9 × 13-inch (23 × 33 cm) baking dish thoroughly with butter or nonstick cooking spray.
For easier removal, you can also line the bottom with parchment paper.
Step 2: Make the Strawberry Cake Batter
In a large bowl, combine:
- Strawberry cake mix
- Eggs
- Vegetable oil
- Milk
- Vanilla extract
Beat for approximately 2 minutes, until the batter is smooth and evenly combined.
Do not overmix.
The batter should be thick, smooth, and beautifully pink.
Step 3: Add the Strawberry Mixture
In a small bowl, combine the chopped strawberries with strawberry jam and powdered sugar.
Stir gently.
This creates little pockets of strawberry flavor throughout the cake.
Step 4: Prepare the Cream Cheese Filling
Place softened cream cheese and butter in another bowl.
Beat until smooth and creamy.
Gradually add the powdered sugar.
Add vanilla extract and a small pinch of salt.
Beat until the mixture becomes fluffy and smooth.
The filling should be thick but spreadable.
Step 5: Assemble the Cake
Pour approximately two-thirds of the strawberry cake batter into the prepared baking dish.
Spread it evenly.
Scatter the strawberry mixture over the batter.
Then spoon the cream cheese mixture over the surface in several large dollops.
Pour the remaining strawberry batter around and partially over the cream cheese.
Do not try to make everything perfectly smooth.
The irregular distribution is what gives an earthquake cake its characteristic appearance.
Step 6: Create the Earthquake Effect
Using a butter knife or spatula, gently swirl the cream cheese mixture through the strawberry batter.
Make a few large swirls rather than completely mixing the layers.
You want visible streaks of cream cheese throughout the cake.
Sprinkle the white chocolate chips evenly over the top.
Add shredded coconut if desired.
Step 7: Bake
Place the cake in the preheated oven.
Bake for approximately 40–50 minutes.
The edges should be set while the center remains slightly soft.
Do not worry if the surface develops cracks and uneven valleys.
That is exactly what you want!
The cake should look slightly “broken” or cracked when it comes out of the oven.
Step 8: Add Fresh Strawberries
Allow the cake to cool for approximately 30–45 minutes.
Scatter fresh chopped strawberries over the top.
For an extra sweet finish, dust lightly with powdered sugar.
Step 9: Cool Completely
Allow the cake to cool completely before cutting.
For an especially creamy texture, refrigerate it for 1–2 hours before serving.
This allows the cream cheese layer to firm up and makes the slices easier to cut.
🍰 Preparation Methods
Method 1: Classic Earthquake Method
The classic method involves layering cake batter with a rich cream cheese mixture and swirling the two together.
As the cake bakes, the different textures move and settle, creating the signature cracks and valleys.
Method 2: Strawberry Swirl Method
For stronger strawberry flavor, add strawberry jam between the layers and swirl it gently through the batter.
This creates beautiful ribbons of strawberry throughout the cake.
Method 3: Extra Creamy Method
For a richer cheesecake-like center, increase the cream cheese mixture slightly and refrigerate the finished cake before serving.
🌋 How the “Earthquake” Formation Happens
The unique appearance of this cake is created naturally during baking.
The strawberry cake batter rises as it heats.
At the same time, the heavier cream cheese mixture moves through the softer batter.
The different mixtures expand and settle at different rates.
As the cake continues baking and cooling, the surface develops:
- Cracks
- Valleys
- Creamy pockets
- Strawberry swirls
- Uneven ridges
This gives the cake its fun earthquake-like appearance.
You don’t need to make the cracks yourself—the oven does the work!
📜 History of Earthquake Cakes
Earthquake cakes are part of a broader American tradition of easy, layered and swirl-style desserts.
The concept became popular because it combines a simple cake mix with rich fillings and toppings without requiring precise decoration.
The name comes from the appearance of the finished cake. Instead of looking perfectly smooth like a traditional frosted cake, it develops cracks and irregular sections as it bakes.
Over time, bakers created many versions, including chocolate, coconut, pineapple, pumpkin, red velvet, and strawberry variations.
The strawberry version is especially popular because the bright fruit flavor pairs beautifully with cream cheese and white chocolate.
🍓 Benefits of This Recipe
This is an indulgent dessert, but there are several practical benefits to making it at home.
1. Easy Preparation
Using a cake mix makes the recipe beginner-friendly.
2. Beautiful Without Decorating
The natural cracks and swirls create the decoration for you.
3. Great Strawberry Flavor
Fresh strawberries, strawberry cake, and strawberry jam provide multiple layers of fruit flavor.
4. Customizable
You can add white chocolate, coconut, nuts, or additional fruit.
5. Perfect for Sharing
A 9 × 13-inch cake makes plenty of servings for family gatherings and parties.
6. Make-Ahead Friendly
The cake can be prepared in advance and chilled until serving.
💡 Tips for the Best Strawberry Earthquake Cake
Use Room-Temperature Cream Cheese
Softened cream cheese blends much more easily and produces a smoother filling.
Don’t Overmix
Overmixing the cake batter can make the finished cake less tender.
Don’t Overbake
The center should remain soft and moist.
Don’t Over-Swirl
A few gentle swirls are better than completely mixing the cream cheese into the batter.
Use Fresh Strawberries
Fresh strawberries provide the best flavor and texture.
Let It Cool
The creamy filling becomes firmer as the cake cools.
Chill Before Serving
Refrigerating the cake gives it an especially delicious cheesecake-like texture.
🍓 Delicious Variations
White Chocolate Strawberry Earthquake Cake
Add extra white chocolate chips to the batter and sprinkle more on top.
Strawberry Cheesecake Earthquake Cake
Add a little extra cream cheese filling and serve with whipped cream.
Strawberry Coconut Earthquake Cake
Add shredded coconut to the batter and topping.
Chocolate Strawberry Earthquake Cake
Use chocolate chips on top for a chocolate-covered-strawberry flavor combination.
Strawberry Raspberry Earthquake Cake
Add fresh raspberries along with the strawberries for extra fruity flavor.
🍽️ Serving Suggestions
Serve each slice with:
- Whipped cream
- Fresh strawberries
- Strawberry sauce
- Vanilla ice cream
- Powdered sugar
- White chocolate drizzle
- Fresh mint
For a special dessert presentation, warm a slice slightly and serve it with a scoop of vanilla ice cream.
🧊 Storage
Because this cake contains cream cheese and fresh strawberries, store leftovers in the refrigerator.
Keep the cake covered in an airtight container or tightly covered with plastic wrap.
It is best enjoyed within a few days.
You can also freeze portions without the fresh strawberry topping. Thaw them slowly in the refrigerator before serving.
❤️ Why You’ll Love This Cake
You will love this Strawberry Earthquake Cake because it combines everything you want in an irresistible dessert:
🍓 Sweet strawberry flavor
🍰 Moist and tender cake
🧀 Creamy cheesecake filling
🍫 Delicious white chocolate
✨ Beautiful cracks and swirls
🥄 Soft, rich texture
❤️ Easy homemade preparation
Every slice looks different, which makes the cake even more fun to serve.
👩🍳 Perfect Recipe Method at a Glance
Prepare batter → Make cream cheese filling → Layer batter → Add strawberries → Add cream cheese → Swirl → Add white chocolate → Bake → Cool → Chill → Serve
The key is not to worry about making the cake look perfect before baking.
The “messy” appearance is the beauty of an earthquake cake!
🍓 Conclusion
The Ultimate Strawberry Earthquake Cake is a beautiful combination of simplicity and indulgence.
A soft strawberry cake batter surrounds pockets of rich cream cheese, sweet strawberries, and creamy white chocolate. As the cake bakes, everything shifts and creates the famous cracks and valleys that make this dessert so distinctive.
It is easy enough for a casual weekend dessert but impressive enough for birthdays, celebrations, family gatherings, and holiday tables.
Most importantly, you don’t need perfect decorating skills. Simply layer, swirl, bake, and let the oven create the magic.