Introduction
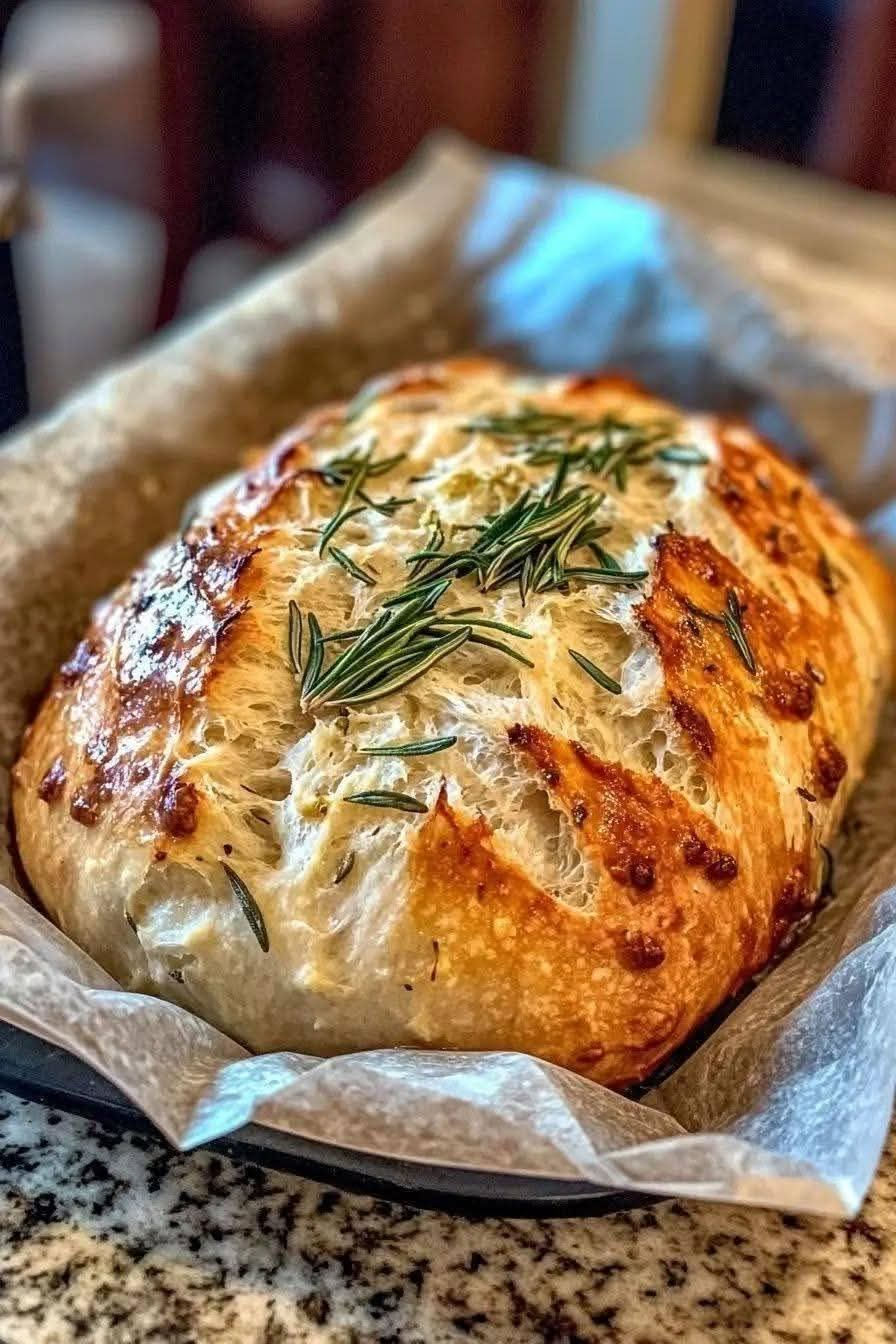
If you love the deep flavor of sourdough bread and the irresistible aroma of roasted garlic and fresh herbs, this Garlic Herb Sourdough Bread is a recipe you absolutely need to try.
This no-knead version is wonderfully simple. Instead of spending a long time kneading the dough, you allow fermentation and time to develop the structure and flavor. The result is a beautifully rustic loaf with a crisp, golden crust and a soft, airy, chewy interior filled with fragrant garlic and herbs.
Every slice is packed with savory flavor. It is delicious alongside soups, pasta, roasted meats, salads, eggs, or simply enjoyed warm with a little butter.
And the best part? Once you make it for family or coworkers, don’t be surprised if everyone starts asking you to make it again!
🍞 Recipe Information
Recipe: Garlic Herb Sourdough Bread
Method: No-knead
Cuisine: Rustic European-inspired
Preparation: 20–30 minutes active time
Fermentation: 8–18 hours
Second rise: 1–2 hours
Baking: 40–50 minutes
Difficulty: Easy to moderate
Yield: 1 large loaf
🛒 Ingredients
For the Sourdough Dough
- 500 g (about 4 cups) bread flour
- 350 g (1½ cups minus 1 tablespoon) lukewarm water
- 100 g active sourdough starter
- 10 g salt
- 1 tablespoon olive oil, optional
Garlic & Herb Mixture
- 5–6 cloves fresh garlic, finely minced
- 2 tablespoons olive oil
- 1 tablespoon fresh parsley, chopped
- 1 tablespoon fresh rosemary, finely chopped
- 1 tablespoon fresh thyme leaves
- ½ teaspoon dried oregano, optional
- ½ teaspoon black pepper
Optional Additions
- ½ cup grated Parmesan
- ½ cup shredded mozzarella
- 2 tablespoons roasted garlic
- A pinch of red pepper flakes
- Flaky sea salt for finishing
🧄 Instructions
Step 1: Prepare the Garlic Herb Mixture
In a small bowl, combine:
- Minced garlic
- Olive oil
- Parsley
- Rosemary
- Thyme
- Oregano
- Black pepper
Mix well and set aside.
For a sweeter, deeper garlic flavor, roast the garlic before using it.
Step 2: Mix the Dough
Place the bread flour in a large bowl.
Add the water and active sourdough starter.
Mix with a wooden spoon or dough scraper until there are no large areas of dry flour.
Cover the bowl and let the mixture rest for approximately 30 minutes.
This resting period helps the flour absorb the water.
Step 3: Add the Salt
Sprinkle the salt over the dough.
Wet your hands slightly and gently work the salt into the dough.
You don’t need traditional kneading.
Simply pinch, fold, and turn the dough several times until the salt is distributed.
Step 4: Add the Garlic and Herbs
Spread part of the garlic-herb mixture over the dough.
Gently stretch one side of the dough and fold it toward the center.
Turn the bowl and repeat the process from the other sides.
Continue until the garlic and herbs are distributed throughout the dough.
Don’t worry if the mixture isn’t perfectly even at this stage.
Step 5: First Fermentation
Cover the bowl with a lid, plastic wrap, or a clean kitchen towel.
Leave it at room temperature for approximately 8–12 hours, depending on the temperature of your kitchen and the strength of your starter.
The dough should become:
- Puffy
- Airy
- Larger in volume
- Filled with bubbles
A warmer room will make fermentation happen faster, while a cooler room will slow it down.
Step 6: Stretch and Fold
During the first few hours of fermentation, perform 3–4 sets of gentle stretch-and-folds.
To do this:
- Wet your hand.
- Grab one side of the dough.
- Stretch it upward gently.
- Fold it over the center.
- Turn the bowl.
- Repeat on all four sides.
This strengthens the dough without traditional kneading.
Step 7: Shape the Loaf
Once the dough has finished its main fermentation, lightly flour your work surface.
Carefully turn the dough out.
Avoid aggressively pressing the dough because you want to preserve the air bubbles created during fermentation.
Shape it into a round boule.
Gently pull the dough toward you across the work surface to create surface tension.
Step 8: Second Rise
Place the shaped dough into a well-floured proofing basket or a bowl lined with a floured kitchen towel.
Cover it.
Allow it to rise for approximately 1–2 hours at room temperature.
Alternatively, refrigerate it overnight for a slower final fermentation and deeper flavor.
Step 9: Preheat the Dutch Oven
Place a Dutch oven with its lid inside the oven.
Preheat to:
230°C (450°F)
Allow the Dutch oven to heat for approximately 30–45 minutes.
A very hot baking vessel helps create the beautiful crust and strong oven spring.
Step 10: Score the Bread
Carefully transfer the dough onto parchment paper.
Using a very sharp knife or bread lame, make one deep slash across the top.
You can also create decorative cuts.
Scoring gives the expanding bread a controlled place to open during baking.
Step 11: Bake
Carefully place the dough into the hot Dutch oven.
Cover with the lid.
Bake at 230°C (450°F) for about 25–30 minutes.
Then remove the lid.
Reduce the temperature to approximately 210°C (410°F) and continue baking for another 15–20 minutes.
The bread should be beautifully golden brown and sound hollow when tapped.
Step 12: Cool Completely
Remove the bread from the Dutch oven.
Place it on a wire rack.
Allow it to cool for at least 1 hour before slicing.
Although it may be tempting to cut into it immediately, allowing the bread to cool helps the interior finish setting.
🌿 Preparation Methods
Method 1: Classic No-Knead Method
This is the easiest approach.
Mix the dough, allow time to ferment, perform a few stretch-and-folds, shape, proof, and bake.
The long fermentation does most of the work.
Method 2: Overnight Method
After shaping, place the dough in the refrigerator overnight.
The cold fermentation develops a deeper sourdough flavor and makes the bread easier to handle the following day.
Method 3: Roasted Garlic Method
For a sweeter and more sophisticated garlic flavor, roast whole garlic cloves with a little olive oil until soft and golden.
Mash the roasted garlic and incorporate it into the dough during folding.
This produces a milder, sweeter garlic flavor than raw garlic.
🍞 How the Bread Forms
The beautiful structure of sourdough bread comes from fermentation.
The sourdough starter contains wild yeast and beneficial microorganisms.
During fermentation, the yeast produces carbon dioxide.
Those gases become trapped within the developing dough structure, creating bubbles.
The dough gradually becomes:
Flour + Water + Starter → Fermentation → Gluten Structure → Gas Bubbles → Airy Bread
During baking, the trapped gases expand rapidly.
This creates oven spring, causing the loaf to rise dramatically.
At the same time, the intense heat creates a crisp crust through browning reactions.
The garlic and herbs release their aromas into the bread, creating the characteristic savory fragrance.
📜 History of Sourdough Bread
Sourdough is one of the oldest known ways of leavening bread.
Long before commercial baker’s yeast became widely available, people relied on naturally occurring microorganisms to ferment flour and water.
Ancient bread-making cultures discovered that a portion of fermented dough could be saved and used to start the next loaf.
Over centuries, sourdough traditions developed throughout Europe and other parts of the world.
The modern no-knead approach became especially popular because it demonstrates that time can replace much of the physical work traditionally associated with bread making.
Garlic and herbs are natural companions to rustic bread, making this modern combination a delicious continuation of a very old bread-making tradition.
🧄 Benefits of Homemade Garlic Herb Sourdough
This is still bread and should be enjoyed as part of a balanced diet, but homemade sourdough offers several advantages.
1. Simple Ingredients
You control exactly what goes into your loaf.
2. Long Fermentation
The fermentation process develops complex flavor and aroma.
3. No Commercial Yeast Required
A traditional sourdough starter provides the leavening.
4. Flavorful Herbs
Fresh herbs add aroma and flavor without needing large amounts of seasoning.
5. Homemade Freshness
Nothing compares with a loaf coming directly from your own oven.
6. Versatile
One loaf can accompany breakfast, lunch, dinner, or snacks.
⭐ Important Tips for Perfect Bread
Use an Active Starter
Your starter should be bubbly and active before making the dough.
Don’t Rush Fermentation
Sourdough depends heavily on time and temperature.
Watch the Dough, Not Just the Clock
The exact fermentation time can vary depending on the temperature of your kitchen and the strength of your starter.
Don’t Add Too Much Garlic
Large amounts of raw garlic can affect the dough’s flavor and structure. Start with a moderate amount.
Keep the Dough Moist
A slightly sticky dough is normal for sourdough.
Handle Gently
Avoid pressing all the air out of the dough during shaping.
Preheat the Dutch Oven
A properly heated Dutch oven helps create excellent oven spring.
Let the Bread Cool
Cutting too early can result in a gummy interior.
🧀 Delicious Variations
Garlic Parmesan Sourdough
Add grated Parmesan during the folding process.
Cheesy Garlic Herb Sourdough
Add mozzarella or cheddar for a wonderfully melty loaf.
Spicy Garlic Sourdough
Add red pepper flakes and a little chili powder.
Roasted Garlic Rosemary Sourdough
Use roasted garlic with fresh rosemary for a rich, aromatic combination.
Garlic Butter Sourdough
Brush the finished loaf with melted garlic butter while it is still warm.
🍽️ Serving Suggestions
This bread is fantastic served with:
🍲 Creamy soups
🍝 Pasta
🥗 Fresh salads
🍗 Roast chicken
🥩 Grilled meats
🍳 Eggs
🧀 Cheese boards
🍅 Tomato soup
🥣 Stews
It also makes an incredible base for homemade garlic toast.
Simply slice the bread, brush it with garlic butter, and toast until crisp.
🧈 Garlic Butter Topping
For an extra-special finish, combine:
- 3 tablespoons melted butter
- 1 minced garlic clove
- 1 tablespoon chopped parsley
- Pinch of salt
Brush the mixture over warm slices of sourdough.
For a cheesy version, sprinkle Parmesan over the top and broil briefly until golden.
🧊 Storage
Once completely cooled, store the bread in a paper bag or bread box at room temperature for about 2–3 days.
Avoid storing crusty bread in the refrigerator because refrigeration can make it stale faster.
For longer storage, slice the bread and freeze it in an airtight freezer bag.
Individual slices can be toasted directly from frozen.
❤️ Why You’ll Love This Recipe
You will love this Garlic Herb Sourdough because it is:
🧄 Packed with garlic flavor
🌿 Fragrant with fresh herbs
🍞 Crisp and golden outside
☁️ Soft and airy inside
🔥 Beautifully rustic
😋 Full of sourdough flavor
🙌 Surprisingly easy to make
And because it’s a no-knead recipe, most of the work is done simply by time and fermentation.
👩🍳 The Complete Method at a Glance
Mix flour + water + starter → Rest → Add salt → Add garlic and herbs → Stretch and fold → Ferment → Shape → Proof → Score → Bake → Cool → Slice
The most important ingredients aren’t just flour, water, and starter.
They’re also:
Patience + Time + Gentle Handling + Heat
🌟 Conclusion
This Garlic Herb Sourdough Bread is the perfect combination of rustic homemade bread and irresistible savory flavor.
The long fermentation gives the loaf its characteristic sourdough depth, while garlic, rosemary, thyme, and parsley create an incredible aroma.
The final bread has a crisp golden crust, airy interior, fragrant herbs, and delicious garlic flavor.
It’s wonderful served alongside dinner, transformed into garlic toast, used for sandwiches, or simply eaten warm with butter.
Once your family and friends taste it, don’t be surprised if they start asking you to make another loaf!