Introduction
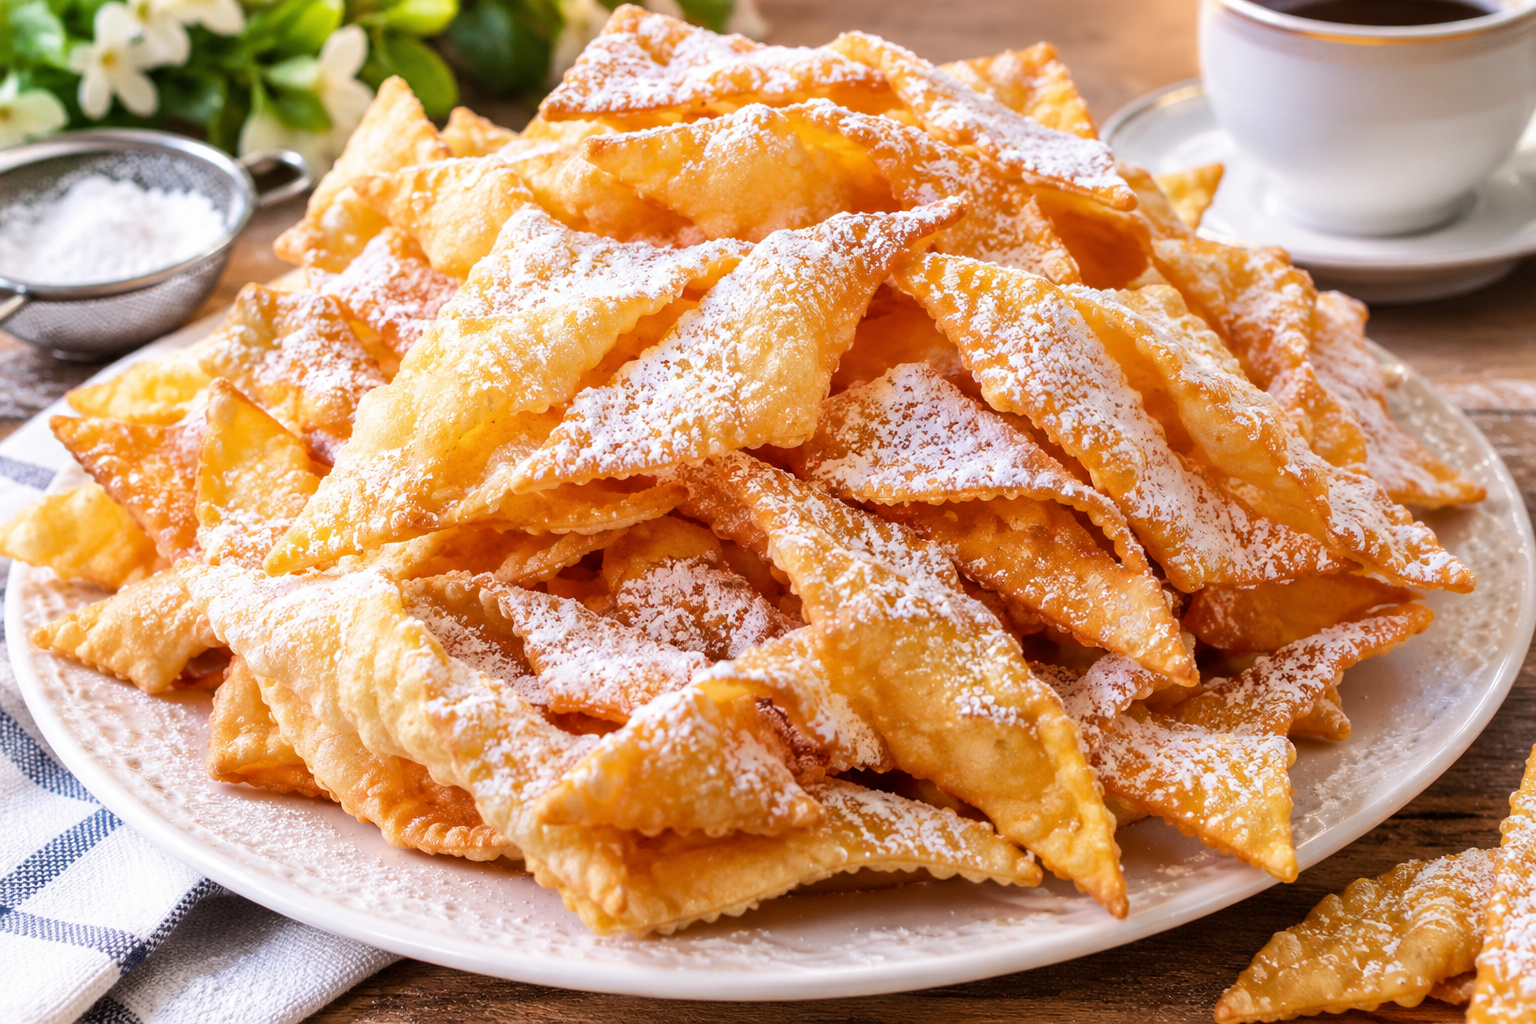
Angel Wings are delicate, crispy, golden pastries made from a simple enriched dough. They are traditionally rolled or stretched very thin, shaped into beautiful pieces, and fried until crisp. Their light texture and sweet flavor make them a wonderful treat for holidays, celebrations, afternoon tea, or simply enjoying with a cup of coffee or tea.
This recipe uses all-purpose flour, egg yolks, sugar, melted butter, milk, and vanilla extract to create a tender and flavorful dough. Once fried, the pastries can be dusted with powdered sugar or served with other sweet toppings.
The name Angel Wings comes from the pastry’s light, delicate appearance. Depending on the country and culinary tradition, similar pastries may have different names and slightly different shapes and ingredients.
History of Angel Wings
Angel Wings belong to a broad family of thin, fried pastries found in many culinary traditions around the world.
In Europe, similar pastries are associated with festive occasions, especially Carnival, when families traditionally prepared rich fried sweets before the beginning of Lent. Different countries developed their own versions, using different shapes, flavorings, and toppings.
In Poland, a similar pastry is known as faworki or chrust. In France, related pastries include bugnes. Italy has several varieties of thin fried Carnival pastries, while other regions have their own versions.
Although the names and recipes vary, the basic idea is similar: prepare a thin pastry dough, shape it into delicate pieces, fry until golden and crisp, and finish it with sugar.
Ingredients
For the Dough
- 2 cups all-purpose flour
- 4 egg yolks
- 2 tablespoons granulated sugar
- 2 tablespoons butter, melted
- ¼ cup milk
- 1 teaspoon vanilla extract
For Frying
- Vegetable oil, sunflower oil, or another neutral frying oil, enough for deep frying
For Finishing
Choose one or more:
- Powdered sugar
- Granulated sugar
- Cinnamon sugar
- Honey
- Chocolate sauce
- Caramel sauce
- Fruit preserves
Equipment
You will need:
- Large mixing bowl
- Measuring cups and spoons
- Rolling pin
- Knife or pastry cutter
- Deep, heavy-bottomed pan or deep fryer
- Slotted spoon or kitchen tongs
- Paper towels or a wire rack
- Baking sheet or large plate
Preparation
Before beginning, prepare your ingredients and workspace.
- Measure the flour and sugar.
- Separate the egg yolks from the egg whites.
- Melt the butter and allow it to cool slightly.
- Measure the milk.
- Prepare your frying pan and oil.
- Have a plate or wire rack ready for draining the cooked pastries.
Keeping everything prepared before you begin makes the process easier and safer.
Method 1: Preparing the Dough
Step 1: Combine the Dry Ingredients
Place the flour and sugar in a large mixing bowl.
Stir them together so that the sugar is evenly distributed throughout the flour.
Step 2: Add the Egg Yolks
Make a small well in the center of the flour mixture.
Add the four egg yolks.
The egg yolks provide richness, color, and tenderness to the dough.
Step 3: Add Butter and Vanilla
Pour in the melted butter and vanilla extract.
Mix gently with a wooden spoon or your hands.
Step 4: Add the Milk
Gradually add the milk while mixing.
Do not add all the milk immediately. The exact amount needed can vary depending on the flour and the size of the egg yolks.
The goal is to create a smooth dough that is firm enough to roll very thin.
Method 2: Kneading the Dough
Transfer the dough onto a lightly floured work surface.
Knead it for approximately 5–8 minutes.
The dough should become:
- Smooth
- Elastic
- Soft but not sticky
- Easy to roll
If the dough feels excessively sticky, add a small amount of flour.
If it feels too dry, add a tiny amount of milk.
Avoid adding too much flour because a very stiff dough can produce harder pastries.
Method 3: Resting the Dough
Shape the dough into a ball.
Cover it with plastic wrap or a clean kitchen towel.
Allow it to rest for approximately 20–30 minutes.
Resting allows the gluten to relax, making the dough easier to roll very thin.
This step is particularly useful when making delicate pastries.
Method 4: Rolling the Dough
Divide the dough into several smaller portions.
Take one portion and keep the remaining dough covered so it does not dry out.
Roll the dough on a lightly floured surface.
Continue rolling until it is very thin.
Thin dough is important because it gives Angel Wings their characteristic delicate and crispy texture.
Try to roll the dough evenly so that all pieces cook at approximately the same rate.
Method 5: Forming the Angel Wings
Cut the thin dough into strips or rectangles.
A typical piece can be approximately:
- 2–3 inches wide
- 4–5 inches long
Make a small slit in the center of each piece.
You can then create the classic shape by pulling one end through the slit.
This creates a twisted, wing-like appearance.
You can also experiment with other shapes, such as:
- Twists
- Ribbons
- Bows
- Loops
- Simple strips
The important thing is to keep the pieces relatively thin and similar in size.
Formation of Angel Wings
The formation of Angel Wings is one of the most enjoyable parts of the recipe.
A simple traditional formation is:
- Roll the dough very thin.
- Cut it into rectangular strips.
- Make a small slit in the middle of each strip.
- Take one end of the dough.
- Gently pull it through the slit.
- Straighten the pastry slightly to create a graceful wing-like shape.
Do not twist the dough too tightly. Leaving some space allows the pastry to fry evenly and become crisp.
Method 6: Heating the Oil
Pour enough neutral oil into a deep, heavy-bottomed pan to allow the pastries to float freely.
Heat the oil to approximately 350°F–365°F (175°C–185°C).
A kitchen thermometer is the safest and most reliable way to check the temperature.
If the oil is too cool, the pastries may absorb too much oil.
If the oil is too hot, the outside can brown too quickly while the pastry becomes unevenly cooked.
Safety: Never leave hot oil unattended, and keep water away from the hot oil.
Method 7: Frying the Angel Wings
Carefully place a few formed pastries into the hot oil.
Do not overcrowd the pan.
Fry for approximately 1–2 minutes per side, depending on thickness and oil temperature.
The pastries should become:
- Light golden
- Crisp
- Delicate
- Slightly blistered in places
Turn them carefully using tongs or a slotted spoon.
Once golden, remove them from the oil.
Method 8: Draining
Place the fried Angel Wings on a wire rack or a plate lined with paper towels.
Allow excess oil to drain.
Continue frying the remaining pastries in small batches.
Give the oil a moment to return to the correct temperature between batches if necessary.
Method 9: Finishing
While the Angel Wings are still slightly warm, dust them generously with powdered sugar.
For extra flavor, combine powdered sugar with a small amount of cinnamon.
You can also serve them with:
- Honey
- Chocolate sauce
- Caramel
- Strawberry sauce
- Raspberry preserves
Alternative Baking Method
Although traditional Angel Wings are fried, you can experiment with baking them.
- Preheat the oven to 375°F (190°C).
- Arrange the shaped pastries on a parchment-lined baking sheet.
- Lightly brush them with melted butter.
- Bake until lightly golden and crisp, approximately 8–12 minutes, depending on thickness.
- Allow them to cool.
- Dust with powdered sugar.
The baked version will have a different texture and may not be quite as crisp or delicate as the traditional fried version.
Tips for Perfect Angel Wings
1. Roll the dough very thin
This is one of the most important steps. Thick dough will produce a heavier pastry.
2. Don’t overcrowd the oil
Adding too many pieces at once can lower the oil temperature.
3. Keep the dough covered
Unused dough can dry out while you are shaping another batch.
4. Watch the color
Angel Wings cook quickly. Remove them when they become lightly golden rather than dark brown.
5. Drain properly
A wire rack allows excess oil to drip away and helps preserve the crisp texture.
6. Add sugar after frying
Powdered sugar added after cooking provides a beautiful finish without melting into the hot oil.
Benefits
Angel Wings are primarily a sweet treat, rather than a health-focused food, but their ingredients provide some nutritional components.
- Egg yolks provide protein and nutrients such as choline and vitamin B12.
- Milk provides protein and calcium.
- Butter contributes fat and flavor.
- Flour provides carbohydrates, which are a source of energy.
- Vanilla adds flavor without requiring a large amount.
Because the pastry is fried and contains sugar and butter, it is best enjoyed in moderation as part of a balanced diet.
Serving Ideas
Angel Wings are excellent when served fresh and crisp.
With Tea
Serve them with black tea, green tea, mint tea, or herbal tea.
With Coffee
Their sweetness pairs especially well with coffee or espresso.
As a Dessert
Arrange them on a serving plate and dust generously with powdered sugar.
For Parties
Pile the pastries into a large serving bowl for birthdays, holidays, family gatherings, or celebrations.
With Dipping Sauces
Serve them with small bowls of:
- Chocolate sauce
- Caramel
- Honey
- Berry sauce
- Vanilla cream
Angel Wings for Dessert Lovers
If you love light, crispy, sweet pastries, Angel Wings are a wonderful choice.
The best part is their contrast: the outside becomes crisp and delicate while the pastry itself retains a light, buttery character.
For extra indulgence, drizzle warm chocolate over the finished pastries and sprinkle them with powdered sugar.
For a more traditional presentation, simply use powdered sugar and allow the delicate shape of the pastry to be the focus.
Flavor Variations
Cinnamon Angel Wings
Mix cinnamon with powdered sugar and sprinkle it over the finished pastries.
Lemon Angel Wings
Add a little finely grated lemon zest to the dough for a fresh citrus flavor.
Orange Angel Wings
Add orange zest and a tiny amount of orange extract or orange-flavored sugar.
Chocolate Angel Wings
Drizzle melted chocolate over the cooled pastries.
Honey Angel Wings
Drizzle a small amount of honey over the finished pastries just before serving.
Common Mistakes
Dough is too thick
If the dough is not rolled thin enough, the finished pastry can become heavy instead of delicate.
Pastries become greasy
This usually happens when the oil temperature is too low or too many pastries are fried at once.
Pastries burn
The oil may be too hot. Reduce the heat and allow the temperature to stabilize.
Dough is difficult to roll
Let it rest longer. Resting allows the gluten to relax.
Pastries lose their crispness
Make sure they are thoroughly drained after frying and store them in an airtight container once completely cool.
Storage
Allow the Angel Wings to cool completely before storing them.
Place them in an airtight container at room temperature.
For the best texture, enjoy them within a few days.
Avoid storing them while they are still warm because trapped steam can make them soft.
Conclusion
Angel Wings are a beautiful example of how a few simple ingredients can be transformed into an elegant and delicious dessert. The combination of flour, egg yolks, sugar, butter, milk, and vanilla creates a rich dough that can be rolled thin, shaped into delicate wings, and fried until beautifully crisp.
Their long history of similar pastries across different cultures shows how beloved thin, fried sweets have been for generations. Whether prepared for a holiday, family celebration, afternoon tea, or a simple dessert, Angel Wings bring a sense of tradition and joy to the table.
For lovers of crispy pastries, sweet treats, and homemade desserts, these delicate golden pieces are especially enjoyable when served warm with powdered sugar.