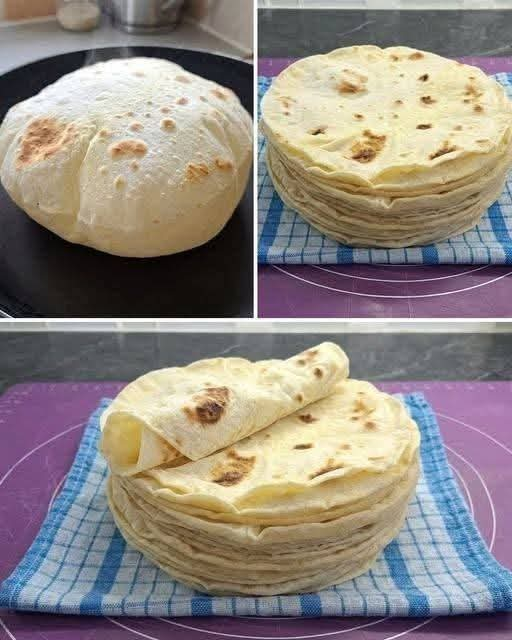
Introduction
Have you ever wanted to make fresh, delicious homemade bread without kneading dough for hours or spending money at the bakery every day? This easy homemade bread recipe is perfect for beginners, busy families, and anyone who loves the comforting smell of freshly baked bread.
Made with simple, affordable ingredients, this bread requires no eggs, no butter, and no complicated techniques. You don’t need special equipment or professional baking skills. Just mix the ingredients, let the dough rest, shape it, and bake until the outside is beautifully golden and the inside is soft and fluffy.
Whether you serve it for breakfast, lunch, or dinner, this homemade bread is a wonderful addition to your everyday meals. Once you discover how simple it is to make bread at home, you may want to bake it again and again!
Recipe Information
- Preparation Time: 10–15 minutes
- Resting Time: 60–90 minutes
- Cooking Time: 25–35 minutes
- Total Time: Approximately 1 hour 45 minutes
- Difficulty: Easy
- Cuisine: Homemade, everyday bread
- Servings: 6–8 portions
- Cooking Method: Oven baking
Ingredients
You only need a few basic ingredients that are easy to find in most kitchens.
- 3 cups (375 g) all-purpose flour
- 1 cup (240 ml) warm water, plus a little extra if needed
- 2 teaspoons instant yeast (about 7 g)
- 1 teaspoon sugar
- 1 teaspoon salt
- 1 tablespoon olive oil or vegetable oil (optional)
Important: This is a simple no-knead bread recipe. The dough should be soft and slightly sticky rather than dry and hard. Depending on your flour, you may need to adjust the amount of water slightly.
Instructions
Step 1: Prepare the Yeast
Pour the warm water into a large mixing bowl. Add the sugar and instant yeast, then stir gently.
The water should be warm, not hot. Very hot water can damage the yeast and prevent the bread from rising properly.
If you are using active dry yeast, allow the mixture to stand for approximately 5–10 minutes until it becomes foamy. Instant yeast can usually be mixed directly with the flour.
Step 2: Mix the Dry Ingredients
In another bowl, combine the flour and salt. Stir them together so the salt is evenly distributed throughout the flour.
Add the flour mixture to the yeast water gradually, stirring with a wooden spoon or spatula.
Continue mixing until all the flour is moistened and a rough, sticky dough forms. There is no need to knead the dough by hand.
If the dough seems extremely dry, add a tablespoon of water at a time. If it is too wet to handle, sprinkle in a little extra flour.
Step 3: Let the Dough Rise
Cover the bowl with a clean kitchen towel or plastic wrap.
Leave the dough in a warm place for approximately 60–90 minutes, or until it has noticeably increased in size.
The exact rising time depends on the temperature of your kitchen. A warmer environment usually helps the dough rise more quickly.
During this time, the yeast produces gas that creates air pockets, giving the finished bread its soft and airy texture.
Step 4: Shape the Bread
Lightly flour your work surface and turn the dough out onto it.
Gently gather the dough into a round loaf or divide it into smaller portions to make individual bread rolls.
Avoid adding too much flour, as this can make the bread dry and dense. You do not need to knead the dough extensively.
Place the shaped loaf on a baking tray lined with parchment paper. Cover it loosely and let it rest for another 15–20 minutes.
Step 5: Preheat the Oven
Preheat your oven to 200°C (400°F).
Allowing the oven to reach the correct temperature before baking helps the bread cook evenly and develop a golden crust.
For an optional rustic finish, lightly dust the surface of the loaf with flour. You can also make a shallow cut across the top using a sharp knife.
Step 6: Bake the Bread
Place the bread in the preheated oven and bake for approximately 25–35 minutes, depending on its size and shape.
The bread should develop a golden-brown crust and sound hollow when tapped on the bottom. If you use a food thermometer, the center should reach approximately 93–99°C (200–210°F).
Smaller rolls may finish baking sooner than a large loaf, so check them regularly toward the end of the cooking time.
Step 7: Cool and Serve
Remove the bread from the oven and transfer it to a wire rack.
Allow it to cool for at least 15–20 minutes before slicing. Cutting it while it is extremely hot can make the inside gummy.
Serve your homemade bread warm or at room temperature with your favorite spreads, soups, salads, or main dishes.
Preparation Methods
Method 1: Traditional Oven-Baked Bread
This is the recommended method for beginners. Mix the ingredients, allow the dough to rise, shape it gently, and bake it in a hot oven.
The result is a loaf with a lightly crisp crust and a soft interior. It is ideal for sandwiches, toast, and everyday meals.
Method 2: Homemade Bread Rolls
Instead of making one large loaf, divide the dough into 6–8 smaller portions.
Shape each portion into a ball and place the balls on a lined baking tray, leaving some space between them. Allow them to rest for 15–20 minutes, then bake at 200°C (400°F) for approximately 15–22 minutes, checking for a golden finish.
These small rolls are perfect for breakfast, lunchboxes, and family dinners.
Method 3: Rustic Country-Style Bread
For a more rustic appearance, shape the dough into a round loaf and dust the surface with flour before baking.
You can bake it on a preheated baking tray or, if you have one, in a suitable preheated Dutch oven. Always follow the cookware manufacturer’s temperature instructions.
A covered Dutch oven can help create a crispier crust by trapping steam during the early stage of baking.
The History of Homemade Bread
Bread is one of the oldest staple foods in human history. People have been making bread for thousands of years, using locally available grains, water, and different cooking methods.
Early forms of bread were often simple flatbreads made from flour and water. Over time, people discovered fermentation techniques that allowed dough to rise, creating lighter and softer loaves.
As breadmaking developed, families passed recipes and techniques from one generation to another. Traditional homemade bread became an important part of daily meals in many cultures, including Morocco, where bread is commonly served alongside tagines, soups, vegetables, and other dishes.
Today, no-knead bread recipes bring that tradition into modern kitchens. They offer a convenient way to prepare fresh bread with minimal effort and inexpensive ingredients.
Benefits of Making Bread at Home
1. Budget-Friendly Ingredients
Flour, water, yeast, and salt are generally inexpensive ingredients. Making bread at home can help reduce bakery purchases, especially if bread is a regular part of your meals.
Your actual savings will depend on ingredient prices, electricity costs, and how often you bake.
2. No Eggs or Butter Required
This recipe does not require eggs or butter, making it useful for people who want a simple bread recipe without those ingredients.
However, it is not automatically suitable for everyone with allergies. Check the flour, yeast, and any optional ingredients for possible cross-contact or other allergens.
3. Simple Preparation
The no-knead technique reduces hands-on work. It is especially helpful for beginners who find traditional breadmaking intimidating.
Most of the preparation time is spent waiting for the dough to rise rather than actively working with it.
4. Control Over Ingredients
Making bread at home allows you to choose the ingredients and control how much salt, oil, or other additions you use.
You can experiment with whole-wheat flour, seeds, or herbs to create different flavors and textures.
5. Freshness and Flavor
Freshly baked bread has a wonderful aroma and a satisfying texture. Homemade bread can be served warm and adjusted to your family’s preferences.
6. A Useful Family Activity
Preparing bread can be a fun way to involve family members in cooking. Children can help measure ingredients or observe the dough rising, with adult supervision around hot ovens and baking trays.
A nutritional note: Bread is a source of carbohydrates and can provide energy. This recipe is not zero-carb or automatically anti-inflammatory. Its nutritional value depends on the flour and portion size. Choosing whole-grain flour can increase fiber, although the texture may be denser.
Tips for Perfect Homemade Bread
- Use warm water, not hot water. Excessive heat can damage the yeast.
- Measure carefully. Weighing the flour gives more consistent results than using cups alone.
- Do not add too much flour. A slightly sticky dough usually produces softer bread.
- Give the dough enough time to rise. Watch its size rather than relying only on the clock.
- Preheat the oven fully. This helps the loaf develop a better crust.
- Avoid slicing immediately. Letting the bread cool helps the interior finish setting.
- Experiment gradually. If using whole-wheat flour, begin by replacing part of the white flour rather than all of it.
- Check the bread before the end of baking. Small rolls bake faster than a large loaf.
Serving Suggestions
Homemade bread is incredibly versatile. Here are some delicious ways to enjoy it.
For Breakfast
Serve slices with olive oil, honey, jam, peanut butter, or your favorite spread.
For Lunch
Use the bread to prepare sandwiches filled with cheese, tomatoes, lettuce, tuna, or roasted vegetables.
For Dinner
Serve warm bread alongside Moroccan tagine, lentil soup, vegetable soup, bean dishes, or grilled vegetables.
For a Simple Snack
Toast a slice and top it with olive oil, crushed tomatoes, garlic, or fresh herbs.
For Family Gatherings
Prepare small bread rolls and serve them in a basket while they are still slightly warm.
Storage Instructions
At room temperature: Once completely cooled, store the bread in a clean, airtight container or bread bag for approximately 2–3 days.
In the refrigerator: Refrigeration can make bread become stale more quickly, so room-temperature storage is generally preferable for short periods.
In the freezer: Slice the cooled bread, separate the slices if desired, and freeze in a well-sealed freezer bag for up to about 3 months for best quality.
To reheat: Toast individual slices or warm the loaf briefly in an oven. Frozen slices can often be toasted directly from frozen.
If you notice mold, discard the entire loaf rather than cutting away the affected area.
Common Mistakes to Avoid
The dough does not rise: Your yeast may be inactive, the water may have been too hot, or the room may be too cold. Check the yeast’s expiration date and allow additional rising time if needed.
The bread is too dense: Too much flour, insufficient rising time, or inactive yeast may be responsible.
The crust is too hard: The loaf may have baked too long. Check the bread toward the end of the suggested baking time.
The center is gummy: The bread may need more baking time or more time to cool before slicing.
The dough is too sticky: Sticky dough is normal for many no-knead recipes. Use lightly floured hands and a spatula instead of adding large amounts of extra flour.
Frequently Asked Questions
Can I make this bread without kneading?
Yes! Simply mix the ingredients until a rough dough forms, then allow time for the yeast to develop the dough’s structure.
Can I make it without eggs and butter?
Absolutely. Neither eggs nor butter is required for this basic recipe.
Can I make it without yeast?
Not with exactly the same method and expected texture. Yeast-free breads usually require another leavening method, such as baking powder, and will have a different crumb.
Can I use whole-wheat flour?
Yes. Start by replacing about one-quarter to one-half of the all-purpose flour with whole-wheat flour. You may need additional water because whole-wheat flour absorbs more liquid.
Can I cook it without an oven?
This particular recipe is designed for oven baking. A stovetop flatbread is a different option, but it generally needs a modified dough and cooking method.
Is this bread suitable for a healthy diet?
It can fit into many balanced diets. For more fiber, consider whole-grain flour, and enjoy the bread with vegetables, beans, or other nutritious foods. No single bread recipe is guaranteed to prevent inflammation or treat a medical condition.
Conclusion
This easy no-knead homemade bread proves that delicious bread does not have to be complicated or expensive. With flour, water, yeast, salt, and a little patience, you can prepare a fresh loaf without eggs, butter, or hours of kneading.
Whether you are a beginner, a busy parent, or simply someone who enjoys homemade food, this recipe is an excellent place to start. Try the basic version first, then experiment with whole grains, herbs, seeds, or different shapes to discover your favorite variation.
The best part is enjoying a slice of warm, homemade bread that you prepared yourself!