Introduction
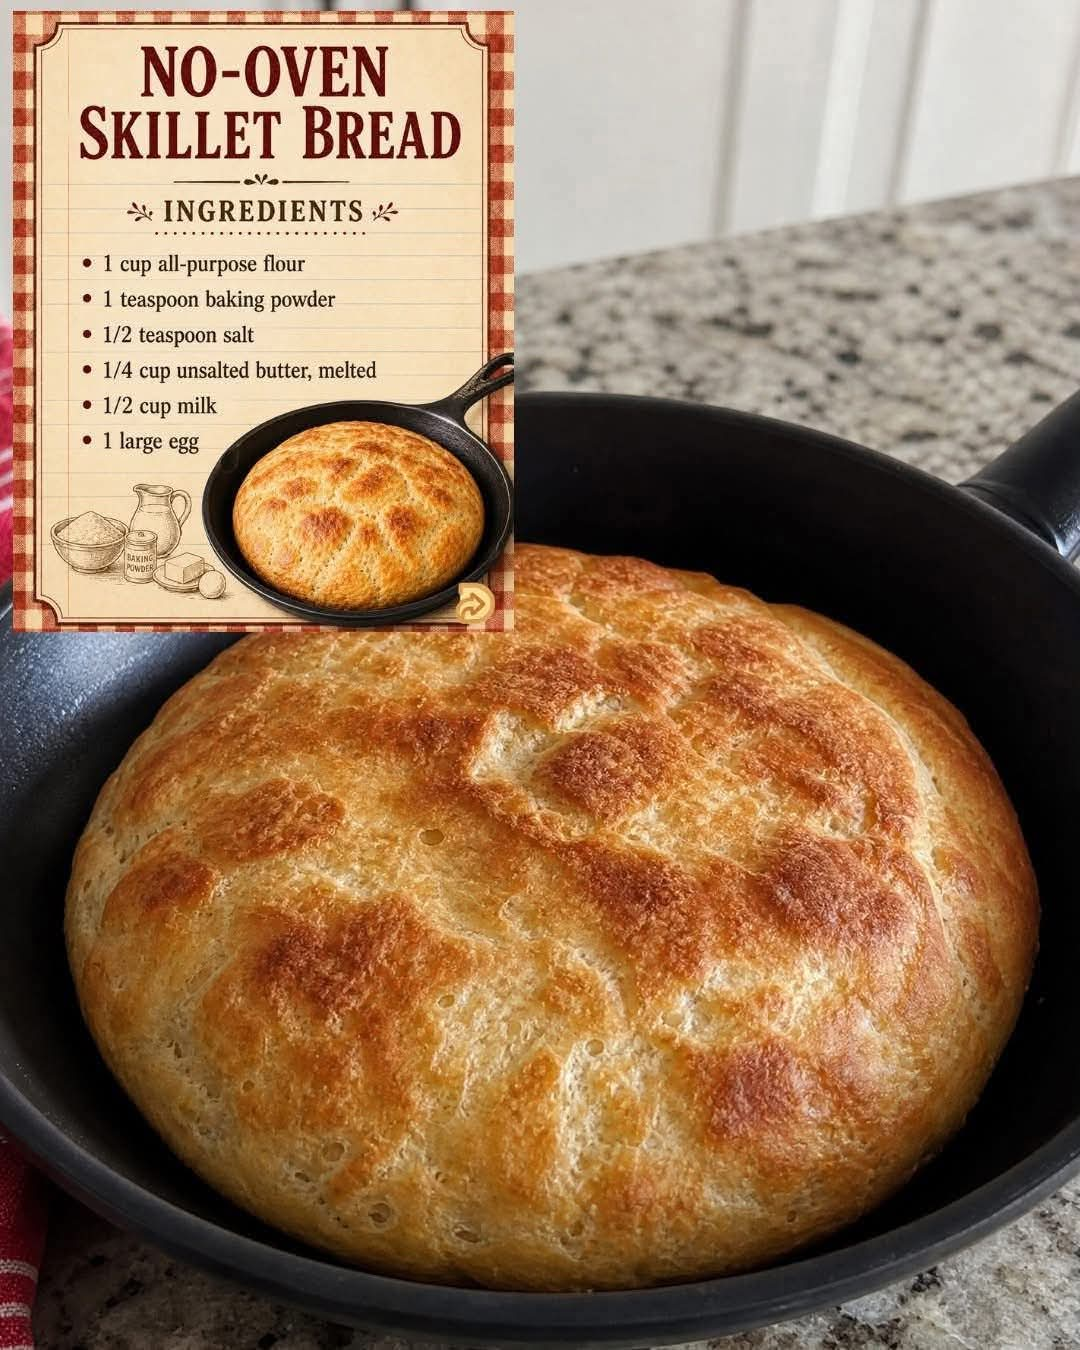
No-Oven Skillet Bread is one of those wonderfully simple homemade breads that proves you don’t need an oven to make something soft, warm, and delicious. Made with basic pantry ingredients and cooked directly in a covered skillet, this bread is perfect when you want fresh bread quickly and easily.
The secret to keeping this bread tender is simple: don’t overmix the batter. A few small lumps are perfectly fine. As soon as the flour disappears into the mixture, stop stirring. Overmixing can develop too much gluten and make the finished bread tougher instead of soft.
This skillet bread is ideal for breakfast, brunch, lunch, dinner, or as a quick accompaniment to soups, stews, eggs, cheese, and grilled foods.
Recipe Information
Recipe: No-Oven Skillet Bread
Preparation Time: 10 minutes
Cooking Time: 15–25 minutes
Total Time: About 30–35 minutes
Servings: 4–6
Cooking Method: Covered skillet
Difficulty: Easy
🥣 Ingredients
Basic Bread
- 1 cup (125 g) all-purpose flour
- 1 teaspoon baking powder
- ¼ teaspoon salt
- 1 large egg
- ¾ cup (180 ml) milk
- 1 tablespoon melted butter or vegetable oil
- 1 teaspoon sugar, optional
For Cooking
- 1 teaspoon butter or oil for greasing the skillet
Optional Additions
For a more flavorful bread, you can add:
- ½ teaspoon garlic powder
- 1 tablespoon chopped fresh parsley
- ½ teaspoon dried oregano
- 2 tablespoons grated Parmesan
- 2 tablespoons shredded cheese
- A pinch of black pepper
- Sesame seeds for topping
👩🍳 Instructions
Step 1: Prepare the Skillet
Choose a heavy-bottomed nonstick or well-seasoned skillet with a lid.
Lightly grease the skillet with butter or oil.
Place it over low heat while you prepare the batter. Avoid making the pan too hot because the outside of the bread can brown before the inside has cooked.
Step 2: Mix the Dry Ingredients
In a medium bowl, combine:
- Flour
- Baking powder
- Salt
- Optional sugar
Whisk them together briefly so the baking powder and salt are distributed evenly.
Step 3: Mix the Wet Ingredients
In another bowl, whisk together:
- Egg
- Milk
- Melted butter or oil
Mix until combined.
Step 4: Combine Everything
Pour the wet ingredients into the dry ingredients.
Using a spoon or spatula, gently mix until the flour has disappeared.
⭐ Important Secret
Do not overmix!
A few small lumps in the batter are completely fine. Stop stirring as soon as you no longer see dry flour.
This keeps the bread soft and tender rather than dense or chewy.
🍳 Cooking Method
Pour the batter into the prepared skillet and spread it gently into an even layer.
Cover the skillet with a lid.
Cook over very low heat for approximately 10–15 minutes.
The exact cooking time depends on the thickness of your bread and the type of skillet you use.
When the top begins to look set and the bottom is lightly golden, carefully flip the bread.
Cook the second side for another 5–8 minutes, still over low heat.
The bread should be cooked through, lightly golden, and soft in the center.
🔥 Alternative Method: Thicker Skillet Bread
For a thicker, more substantial bread, use a smaller skillet.
Pour the batter into the greased pan and cover tightly.
Cook over the lowest possible heat until the top is almost completely set.
Carefully flip the bread using a large spatula.
Continue cooking until the second side is golden brown and the center is fully cooked.
Let it rest for several minutes before slicing.
🧈 Finishing the Bread
As soon as the bread comes out of the skillet, brush the top with a little melted butter.
For a savory version, sprinkle with:
- Garlic powder
- Parsley
- Oregano
- Parmesan
- Sesame seeds
For a sweeter version, brush with butter and serve with honey or jam.
✨ Formation and Texture
The formation of this bread happens through a combination of flour, liquid, egg, and baking powder.
The flour provides structure, while the baking powder creates bubbles as the bread cooks. These bubbles help the bread become lighter and softer.
The egg contributes richness and structure, while milk gives the bread a tender texture.
Cooking the bread slowly in a covered skillet allows heat to circulate around the batter, helping the center cook without requiring an oven.
The final bread should have:
- A lightly golden exterior
- A soft, tender center
- A slightly fluffy texture
- A delicate buttery flavor
📜 History and Inspiration
Skillet breads have a long culinary tradition because cooking bread in a pan is one of the simplest ways to prepare bread without a conventional oven.
Across different cultures, people have developed many forms of pan-cooked breads, flatbreads, griddle cakes, and quick breads. They were especially useful in homes where ovens were unavailable or expensive to operate.
Modern no-oven skillet bread follows the same basic idea: simple ingredients, direct heat, and a covered pan.
Instead of waiting for an oven to preheat, you can prepare the batter and cook it directly on the stovetop.
🌾 Benefits
This recipe has several practical advantages.
1. No Oven Needed
You can make fresh bread using only a stovetop and skillet.
2. Simple Ingredients
The basic recipe uses everyday ingredients that are commonly found in the kitchen.
3. Quick Preparation
There is no long yeast-proofing process. Baking powder provides the lift, making this much faster than traditional yeast bread.
4. Easy to Customize
You can make it sweet, savory, cheesy, herby, or buttery.
5. Fresh Homemade Bread
The bread is best served warm directly from the skillet.
6. Budget-Friendly
The basic recipe requires only a small amount of flour and a few simple ingredients.
💡 Important Tips for Perfect Skillet Bread
Don’t Overmix
This is the most important rule.
Once the flour disappears, stop stirring. Small lumps are perfectly acceptable.
Use Low Heat
Low heat gives the center enough time to cook while preventing the bottom from burning.
Keep the Lid On
The lid traps heat and helps cook the top of the bread.
Don’t Make It Too Thick
If the batter is extremely thick in the skillet, the center can take much longer to cook.
Let It Rest
Allow the bread to rest for a few minutes before cutting. This helps the interior finish setting.
Watch the Bottom
If the bottom is becoming dark too quickly while the center is still wet, reduce the heat immediately.
🧀 Cheesy Version
For a delicious cheesy skillet bread, add:
- ½ cup shredded mozzarella
- 2 tablespoons Parmesan
- ½ teaspoon garlic powder
- 1 tablespoon chopped parsley
Mix gently into the batter before cooking.
You can also sprinkle additional cheese on top before covering the skillet.
🌿 Garlic Herb Version
Add:
- ½ teaspoon garlic powder
- 1 teaspoon dried oregano
- 1 tablespoon chopped parsley
- A pinch of black pepper
After cooking, brush the bread with melted butter mixed with a little garlic and parsley.
🍯 Sweet Version
For a breakfast-style version, omit the savory seasonings and add:
- 1–2 tablespoons sugar
- ½ teaspoon vanilla extract
- A pinch of cinnamon
Serve warm with:
- Honey
- Jam
- Nut butter
- Fresh berries
- Yogurt
🍽️ Serving Suggestions
No-Oven Skillet Bread is extremely versatile.
Serve it with:
Breakfast
- Scrambled eggs
- Omelets
- Cheese
- Honey
- Jam
- Fresh fruit
Lunch
Serve alongside:
- Tomato soup
- Vegetable soup
- Lentil soup
- Chicken soup
- Salad
Dinner
It works beautifully with:
- Grilled chicken
- Beef stew
- Creamy sauces
- Roasted vegetables
- Beans
- Curries
Snack
Slice the bread and serve it with butter, cheese, hummus, or your favorite spread.
🥪 How to Turn It Into a Sandwich
Let the bread cool slightly, then slice it horizontally.
Fill it with:
- Cheese
- Chicken
- Turkey
- Lettuce
- Tomato
- Cucumber
- Avocado
- Your favorite sauce
Toast the assembled sandwich in the skillet for a crispy finish.
🧊 Storage
Allow leftover bread to cool completely.
Store it in an airtight container at room temperature for about 1 day, or refrigerate it for several days.
To reheat, warm it gently in a skillet over low heat.
You can also reheat individual slices in a toaster or microwave, although skillet reheating helps restore a pleasant texture.
❤️ Why Bread Lovers Will Love This Recipe
Bread lovers will appreciate how easy this recipe is.
There is no complicated kneading, no yeast fermentation, and no oven required. The batter comes together quickly, and the result is warm, tender bread with a delicious homemade flavor.
It’s especially useful when you suddenly realize you’re out of bread or simply want something freshly cooked without turning on the oven.
👨🍳 Chef’s Method
For the best possible result, remember these five rules:
1. Measure the flour accurately.
Too much flour can make the bread dense.
2. Don’t overmix.
Stop as soon as the flour disappears.
3. Keep the heat low.
Slow cooking is the secret to a cooked center and golden bottom.
4. Cover the skillet.
The trapped heat helps cook the upper surface.
5. Serve warm.
The bread is at its most tender and delicious shortly after cooking.
🌟 Conclusion
No-Oven Skillet Bread is a simple, comforting homemade bread that anyone can prepare without an oven. With just flour, baking powder, milk, egg, and a few basic ingredients, you can create a warm and tender bread directly on your stovetop.
The most important secret is not to overmix the batter. A few lumps are perfectly fine. Once the flour disappears, stop stirring and let the gentle heat of the covered skillet do the work.