Introduction
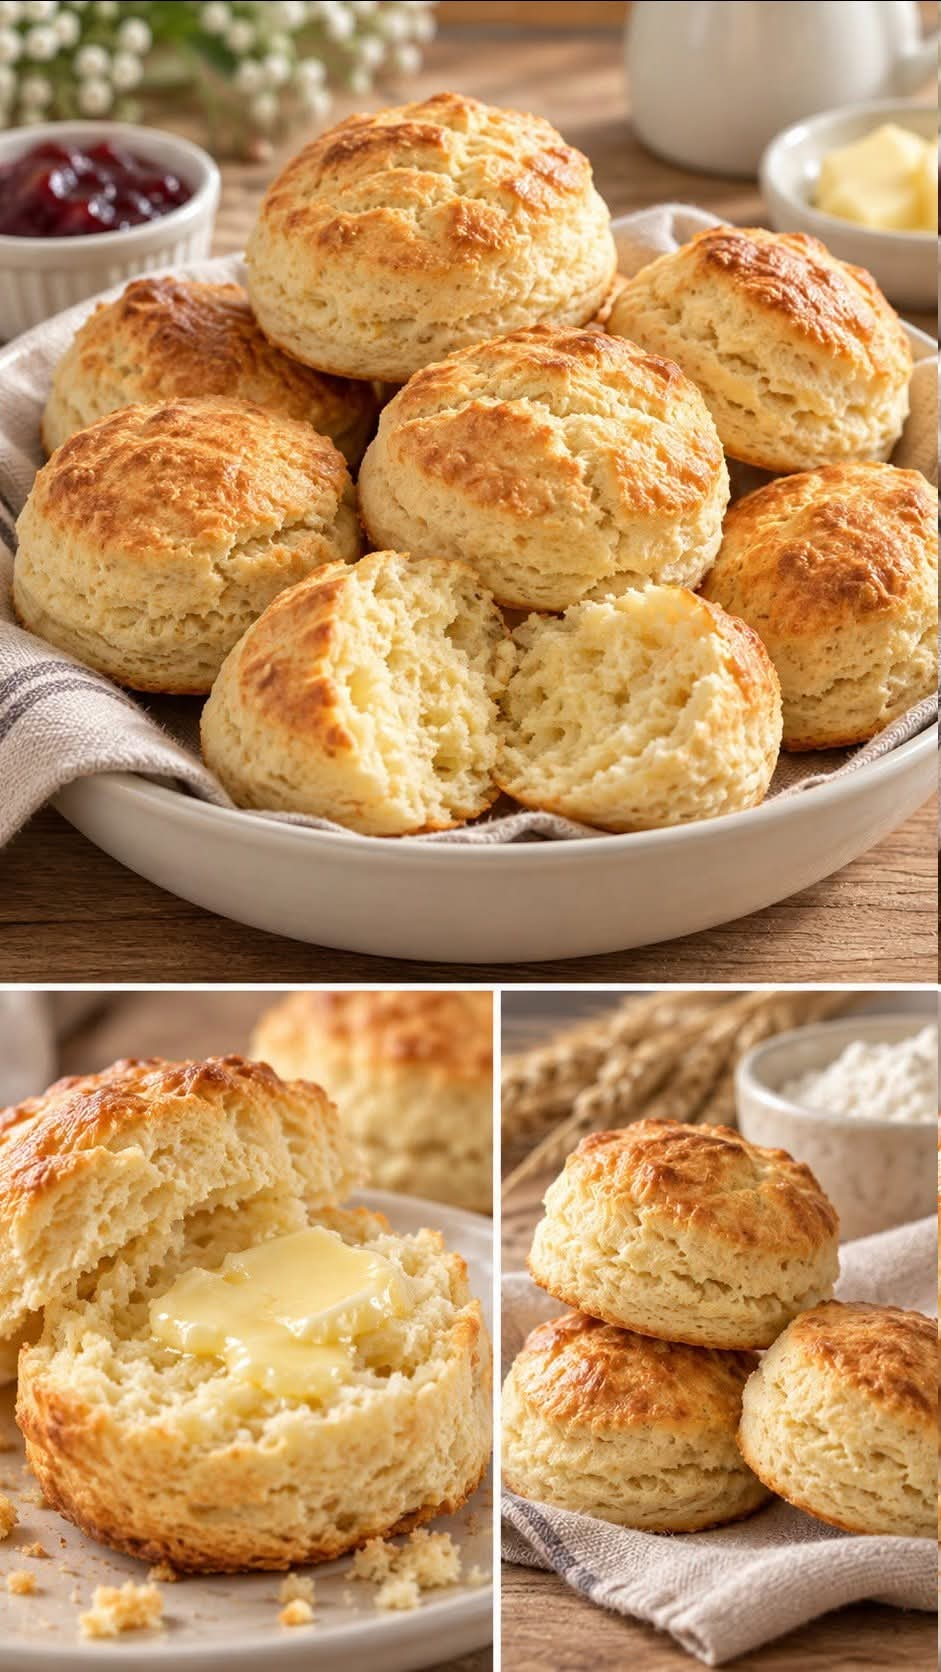
There is nothing quite like the smell of freshly baked biscuits coming out of the oven. With their beautiful golden-brown tops, tender centers, and delicate, flaky layers, homemade buttermilk biscuits are the perfect comfort food for breakfast, brunch, or an afternoon snack.
This easy biscuit recipe is made with simple ingredients that you may already have in your kitchen. You do not need a mixer, special equipment, or advanced baking skills. With a few basic steps, you can prepare delicious, bakery-style biscuits right at home.
These biscuits are especially wonderful when served warm with butter, honey, fruit jam, or your favorite homemade preserves. They are crisp and lightly golden on the outside while remaining soft and fluffy on the inside.
Whether you are preparing a special weekend breakfast, serving guests, or simply craving something homemade, this classic recipe is worth keeping. Once you discover how easy it is to make biscuits from scratch, you may never want to buy them from the store again!
Recipe Information
- Preparation Time: 15 minutes
- Cooking Time: 12–16 minutes
- Total Time: Approximately 30 minutes
- Servings: 8–10 biscuits
- Difficulty: Easy
- Cooking Method: Baking
- Cuisine: Southern American-inspired
- Best For: Breakfast, brunch, snacks, and side dishes
Ingredients
The secret to excellent homemade biscuits is using cold butter, handling the dough gently, and avoiding too much flour during preparation.
Dry Ingredients
- 2 cups (250 g) all-purpose flour
- 1 tablespoon baking powder
- 1/2 teaspoon baking soda
- 1 teaspoon granulated sugar
- 3/4 teaspoon salt
Wet Ingredients
- 6 tablespoons (85 g) cold unsalted butter, cut into small cubes
- 3/4 cup (180 ml) cold buttermilk, plus a little extra if needed
Optional Topping
- 1 tablespoon melted butter for brushing
- A little honey for serving
- Fruit jam or preserves for serving
No buttermilk available? Mix 3/4 cup of milk with 2 teaspoons of lemon juice or white vinegar. Let it stand for 5–10 minutes before using. The texture may differ slightly from traditional buttermilk, but it works well as a substitute.
Instructions
Step 1: Preheat the Oven
Preheat your oven to 425°F (220°C). Line a baking sheet with parchment paper or lightly grease it.
A properly heated oven helps the biscuits rise quickly, creating a fluffy interior and a beautifully golden crust.
Step 2: Combine the Dry Ingredients
In a large mixing bowl, whisk together the flour, baking powder, baking soda, sugar, and salt.
Mix thoroughly so that the raising agents are evenly distributed throughout the flour. This helps the biscuits rise more consistently during baking.
Step 3: Add the Cold Butter
Add the cold butter cubes to the flour mixture.
Using your fingertips, a pastry cutter, or two forks, work the butter into the flour until the mixture resembles coarse crumbs. Some pieces of butter should remain about the size of small peas.
Do not melt the butter before adding it. Cold butter creates pockets of steam during baking, helping the biscuits develop a tender texture and delicate layers.
If the butter starts to soften, place the bowl in the refrigerator for a few minutes.
Step 4: Pour in the Buttermilk
Make a small well in the center of the flour mixture and gradually pour in the cold buttermilk.
Stir gently with a wooden spoon or spatula until a soft, slightly sticky dough forms. If the dough seems unusually dry, add another teaspoon of buttermilk at a time.
Avoid mixing for too long. Overworking the dough can make the biscuits tough instead of light and tender.
Step 5: Shape the Dough
Lightly flour a clean work surface and transfer the dough onto it.
Gently bring the dough together with your hands. Pat it into a rectangle approximately 3/4 to 1 inch thick.
For extra-flaky biscuits, fold the dough in half, gently pat it down, and repeat this process two or three times. Do not knead it like bread dough.
Step 6: Cut the Biscuits
Use a round biscuit cutter approximately 2–2 1/2 inches wide.
Press the cutter straight down into the dough without twisting it. Twisting can seal the edges and prevent the biscuits from rising as well.
Arrange the biscuits on the prepared baking sheet. For softer sides, place them close together so they nearly touch. For crispier sides, leave a little space between each biscuit.
Gather any leftover dough gently, pat it out again, and cut additional biscuits.
Step 7: Bake Until Golden
Place the baking sheet in the preheated oven and bake for 12–16 minutes, or until the biscuits have risen and their tops are golden brown.
Oven temperatures vary, so begin checking them after approximately 12 minutes.
If desired, brush the tops with melted butter immediately after removing them from the oven.
Step 8: Serve Warm
Allow the biscuits to rest for 3–5 minutes before serving.
Split them open carefully and add butter, honey, jam, or preserves. The warm centers will absorb the butter beautifully, making every bite soft, rich, and delicious.
Preparation Methods for Perfect Biscuits
Method 1: The Traditional Hand-Mixing Method
This is the simplest approach for beginners. Combine the dry ingredients, rub in the cold butter, add the buttermilk, and gently shape the dough.
The key is to stop mixing as soon as the ingredients come together. A slightly rough dough is perfectly acceptable.
Method 2: The Folding Method for Flaky Layers
If you prefer biscuits with visible layers, gently fold the dough over itself two or three times before cutting.
Each fold creates additional layers that separate during baking. Keep the butter cold and avoid pressing the dough too firmly.
Method 3: The Food Processor Method
For a quicker preparation method, pulse the flour, baking powder, baking soda, sugar, salt, and cold butter in a food processor until the mixture resembles coarse crumbs.
Transfer the mixture to a bowl, add the buttermilk, and stir gently by hand until the dough forms.
Avoid processing the dough after adding the liquid, as this can overdevelop the gluten.
Method 4: The Freezer-Friendly Method
Prepare and cut the biscuits as directed, then arrange the unbaked biscuits on a tray and freeze until firm.
Transfer them to a freezer-safe bag or container. Bake from frozen at 425°F (220°C), adding a few extra minutes to the baking time as needed. Check that the centers are fully baked before serving.
The History of Homemade Biscuits
Biscuits have a long and interesting history, especially in the southern United States, where soft, leavened biscuits became an important part of everyday cooking.
Early biscuits were often hard, dry baked goods designed to last for long periods. Over time, improvements in flour, leavening agents, and dairy products helped home cooks develop softer, lighter versions.
The introduction and wider availability of baking powder and baking soda made it easier to produce fluffy biscuits without yeast or lengthy rising times.
Buttermilk became a popular ingredient because its acidity works with baking soda to help produce a tender crumb and a pleasant flavor. It also became a practical way to use leftover dairy products in home kitchens.
Today, biscuits are enjoyed in many forms. Some are served with butter and jam at breakfast, while others accompany soups, stews, fried chicken, and rich gravies.
Although recipes differ from family to family, the traditional approach remains simple: flour, a raising agent, fat, liquid, and gentle handling.
Benefits of Making Biscuits at Home
1. Simple, Familiar Ingredients
Homemade biscuits allow you to control exactly what goes into your food. You can choose your flour, adjust the salt, and avoid unnecessary additives if you prefer.
2. Freshness and Flavor
Freshly baked biscuits have a wonderful aroma and a texture that is difficult to reproduce in packaged products. They are especially delicious when served warm.
3. Versatile Serving Options
You can serve these biscuits with sweet or savory ingredients, making them useful for different meals throughout the day.
4. An Affordable Baking Project
The recipe uses common pantry staples and can be prepared without expensive equipment. Making biscuits at home may also cost less than purchasing specialty bakery biscuits.
5. An Easy Recipe for Beginners
There is no yeast, complicated kneading, or lengthy rising process. This makes the recipe a practical introduction to homemade baking.
6. Flexible Ingredient Choices
You can experiment with whole-wheat flour, reduced-sodium ingredients, or different toppings. Keep in mind that changing the ingredients may affect the texture and rise.
Nutritional Considerations
These biscuits provide carbohydrates for energy, while the flour contributes small amounts of protein and other nutrients. Butter adds fat, and the overall nutritional value depends on the ingredients and portion size.
They also contain refined flour and saturated fat, so they are best enjoyed in portions that fit your individual dietary needs. Serving them with eggs, yogurt, or another protein-rich food can help make a more balanced breakfast.
Tips for the Best Homemade Biscuits
- Keep everything cold: Cold butter is essential for creating a tender, flaky texture.
- Measure the flour carefully: Too much flour can make the biscuits dry and heavy. If possible, use a kitchen scale.
- Do not overmix: Stop as soon as the dough comes together.
- Avoid twisting the cutter: Press straight down to help the biscuits rise evenly.
- Use a hot oven: The initial high heat encourages a good rise and golden exterior.
- Do not flatten the dough too much: A thicker dough produces taller biscuits.
- Place biscuits close together: This encourages softer sides, while more space allows the edges to become crispier.
- Bake until golden: Pale biscuits may need another minute or two, depending on your oven.
- Serve fresh: Homemade biscuits are at their best shortly after baking.
Delicious Ways to Serve Biscuits
Classic Butter and Jam
Split a warm biscuit and spread it with butter and your favorite fruit jam. Strawberry, raspberry, and apricot preserves are excellent choices.
Honey Butter Biscuits
Mix softened butter with a little honey and spread it over the warm biscuit for a sweet, comforting treat.
Breakfast Sandwiches
Fill a biscuit with scrambled eggs, cheese, and cooked sausage or another favorite filling for a satisfying breakfast sandwich.
Biscuits with Gravy
Serve the biscuits with creamy sausage gravy for a traditional Southern-inspired breakfast.
With Soup or Stew
These biscuits make an excellent side dish for vegetable soup, chicken soup, beef stew, or creamy casseroles.
Sweet Dessert Biscuits
Serve them with fresh strawberries and whipped cream for a simple dessert inspired by strawberry shortcake.
Storage and Reheating
At Room Temperature
Allow the biscuits to cool completely before storing them in an airtight container. Keep them at room temperature for up to 2 days.
In the Refrigerator
Refrigeration is generally unnecessary for plain biscuits and can make them dry more quickly. If you add perishable fillings or toppings, refrigerate them promptly.
In the Freezer
Freeze cooled biscuits in a freezer-safe bag or airtight container for up to 2–3 months for best quality.
How to Reheat
- Oven: Warm at 300°F (150°C) for approximately 5–8 minutes.
- Microwave: Heat for 10–20 seconds, checking frequently to prevent them from becoming chewy.
- Air fryer: Warm at approximately 300°F (150°C) for 2–4 minutes, checking that they do not dry out.
For an extra-soft finish, brush the biscuits lightly with butter after reheating.
Common Mistakes to Avoid
Why are my biscuits hard?
The dough may have been overmixed, too much flour may have been added, or the biscuits may have baked for too long.
Why didn’t my biscuits rise?
Your baking powder may be old, the oven may not have been hot enough, or the cutter may have been twisted while cutting the dough.
Why are my biscuits dry?
The dough may need a little more buttermilk, or the flour may have been measured incorrectly. Add liquid gradually until the dough comes together.
Why are my biscuits dense?
Too much kneading can develop excess gluten and reduce tenderness. Handle the dough as little as possible.
Can I prepare the dough ahead of time?
Yes. For the best texture, cut the biscuits and refrigerate them briefly before baking, or freeze them unbaked for longer storage.
Frequently Asked Questions
Can I make biscuits without buttermilk?
Yes. Milk mixed with lemon juice or vinegar is a convenient substitute. Plain milk alone can also work, although the flavor and texture may differ.
Can I use salted butter?
Yes. If using salted butter, consider reducing the added salt slightly.
Can I make the biscuits smaller?
Absolutely. Use a smaller cutter and begin checking the biscuits earlier because smaller biscuits may bake faster.
Can I add cheese or herbs?
Yes. Fold a small amount of shredded cheddar, chopped chives, or dried herbs into the dry mixture before adding the buttermilk.
Are homemade biscuits best eaten warm?
Yes. They are usually softest and most flavorful shortly after baking, although properly stored biscuits can be reheated later.
Conclusion
These easy homemade buttermilk biscuits are a wonderful example of how a few everyday ingredients can create something truly special. With their golden tops, soft centers, and buttery flavor, they are perfect for breakfast, brunch, family dinners, or a simple afternoon treat.
The most important secrets are keeping the butter cold, mixing the dough gently, and baking the biscuits in a properly heated oven. Once you master these simple techniques, you can adapt the recipe with sweet toppings, savory fillings, cheese, or herbs.
Whether you enjoy them with homemade jam, a drizzle of honey, or a generous pat of butter, these biscuits are sure to bring warmth and comfort to your table.