Introduction
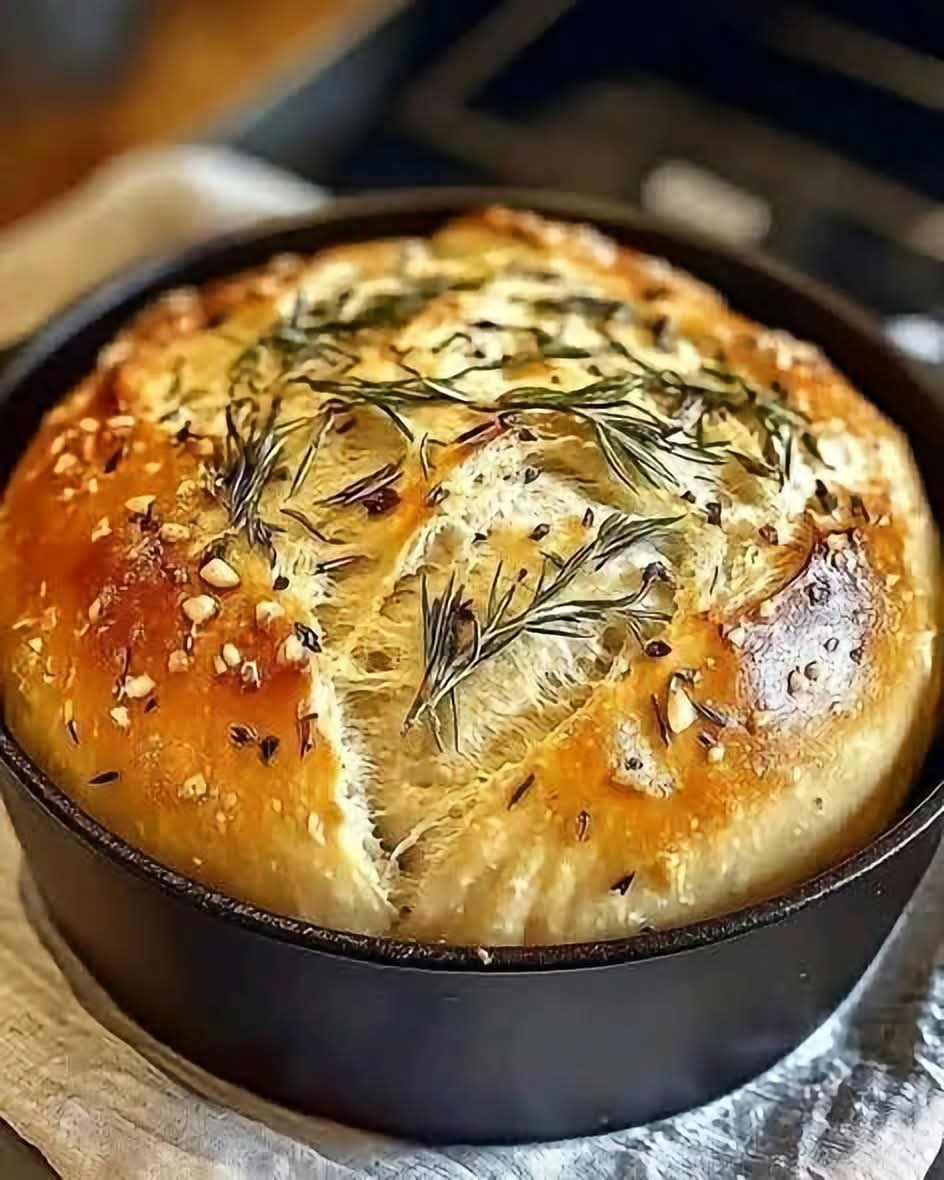
There is something truly special about the smell of freshly baked bread filling your kitchen, especially when it is infused with fragrant garlic, fresh herbs, and the delicious tang of sourdough. This Garlic and Herb Sourdough Bread is a wonderful homemade recipe that combines a crispy golden crust with a soft, airy, flavorful interior.
The best part? You do not need to spend hours kneading dough or use complicated baking techniques. This easy no-knead recipe relies on time, natural fermentation, and a few simple ingredients to create a beautiful loaf that tastes like it came straight from an artisan bakery.
Whether you serve it alongside a warm bowl of soup, enjoy it with olive oil, make delicious sandwiches, or simply eat a slice while it is still slightly warm, this bread is sure to become a favorite.
Garlic brings a rich, savory flavor, while herbs such as rosemary, thyme, and parsley add freshness and aroma. Combined with the distinctive taste of sourdough, these ingredients create a loaf that is comforting, rustic, and perfect for sharing with family and friends.
If you love homemade bread but want a recipe that requires minimal hands-on work, this Garlic and Herb Sourdough Bread deserves a place in your kitchen.
Recipe Information
- Recipe name: Garlic and Herb Sourdough Bread
- Preparation time: 15–20 minutes
- Resting and fermentation time: 8–14 hours, depending on temperature and starter activity
- Baking time: 40–50 minutes
- Total time: Approximately 9–15 hours, including resting
- Difficulty: Easy to moderate
- Yield: 1 medium-large loaf
- Cooking method: No-knead bread baking
- Cuisine: Rustic homemade artisan bread
Ingredients
For the sourdough bread
- 500 g (about 4 cups) bread flour or strong all-purpose flour
- 350 g (1½ cups) lukewarm water
- 100 g (about ½ cup) active sourdough starter, bubbly and recently fed
- 10 g (1¾ teaspoons) fine sea salt
For the garlic and herb flavor
- 4–6 garlic cloves, finely minced
- 2 tablespoons olive oil
- 1 tablespoon fresh rosemary, finely chopped
- 1 tablespoon fresh parsley, chopped
- 1 teaspoon fresh thyme leaves, or ½ teaspoon dried thyme
- ½ teaspoon freshly ground black pepper, optional
For baking
- A little flour for dusting
- Parchment paper
- A Dutch oven or another suitable oven-safe covered baking pot
Important note: This recipe uses an active sourdough starter rather than commercial yeast. If you are new to sourdough baking, your starter should be bubbly, active, and capable of rising after feeding.
Instructions
Step 1: Prepare the garlic and herbs
Peel and finely mince the garlic cloves. Wash the parsley and rosemary, dry them thoroughly, and chop them finely. Remove the small leaves from the thyme stems if you are using fresh thyme.
For a milder garlic flavor, gently sauté the minced garlic in the olive oil over low heat for one or two minutes. Do not let it brown or burn. Allow the mixture to cool completely before adding it to the dough.
Alternatively, use the raw minced garlic for a stronger, more pronounced flavor.
Step 2: Mix the sourdough starter and water
In a large mixing bowl, combine the active sourdough starter with the lukewarm water. Stir until the starter is mostly dispersed.
Add the flour and mix with a wooden spoon or sturdy spatula until no large patches of dry flour remain.
The dough should look rough, sticky, and slightly shaggy. You do not need to knead it or make it perfectly smooth.
Cover the bowl and allow the dough to rest for approximately 30 minutes.
Step 3: Add the salt, garlic, and herbs
Sprinkle the salt over the dough. Add the prepared garlic, olive oil, rosemary, parsley, thyme, and black pepper if desired.
Use wet hands or a spatula to fold the ingredients into the dough. Lift one side of the dough, stretch it gently, and fold it toward the center. Repeat from several sides until the seasonings are distributed as evenly as possible.
The dough may feel sticky, but avoid adding too much extra flour. A slightly moist dough helps create a tender interior.
Step 4: Allow the dough to ferment
Cover the bowl with a lid, reusable cover, or clean kitchen towel.
Leave the dough at room temperature until it has risen noticeably and looks aerated. Depending on the strength of your starter and the temperature of your kitchen, this may take approximately 4–8 hours or longer.
During the first 1½–2 hours, you can perform two or three gentle sets of stretch-and-folds about 30 minutes apart. This is optional but can help strengthen the dough.
To perform a stretch-and-fold, wet your hand, lift one edge of the dough, stretch it upward gently, and fold it over the center. Turn the bowl and repeat around the dough.
Do not judge fermentation by the clock alone. The dough should look puffier, feel lighter, and show signs of air bubbles.
Step 5: Shape the loaf
Lightly flour a clean work surface and gently transfer the dough onto it.
Fold the edges toward the middle, then turn the dough over so the seam is underneath. Using your hands or a dough scraper, gently shape it into a round loaf.
Avoid pressing out all the air. The goal is to create a smooth outer surface while preserving the gas produced during fermentation.
Place the shaped loaf seam-side up in a well-floured proofing basket or a bowl lined with a generously floured kitchen towel.
Step 6: Complete the final proof
Cover the loaf and allow it to rest for approximately 1–2 hours at room temperature, or until it looks slightly puffier.
For a more flexible schedule and deeper sourdough flavor, you can refrigerate the shaped loaf for approximately 8–14 hours, provided the dough has fermented sufficiently beforehand.
If the dough is already very active and fully proofed, avoid leaving it for too long, as overproofing may cause it to spread or collapse.
Step 7: Preheat the oven
Place a Dutch oven with its lid inside the oven. Preheat to 230°C (450°F) for approximately 30–45 minutes.
Heating the covered pot helps create the hot environment needed for a strong oven spring and a beautifully developed crust.
Always handle the hot pot with dry, heat-resistant oven mitts.
Step 8: Transfer and score the dough
Carefully place the dough onto a piece of parchment paper, with the seam facing down.
Use a sharp bread lame or a clean, sharp knife to make one confident slash across the top, approximately 1 cm deep. This allows the loaf to expand during baking.
If desired, sprinkle a tiny amount of flour over the surface for a rustic appearance.
Step 9: Bake the bread
Carefully remove the hot Dutch oven from the oven and lower the dough inside using the parchment paper.
Cover with the lid and bake for 25–30 minutes.
Remove the lid and continue baking for another 15–20 minutes, or until the crust is deeply golden brown.
The exact baking time will depend on your oven and loaf size. The bread should feel firm, and its internal temperature should reach approximately 96–99°C (205–210°F).
Step 10: Cool before slicing
Remove the loaf from the Dutch oven and transfer it to a wire rack.
Allow it to cool for at least 1–2 hours before slicing. Although the aroma may make it tempting to cut immediately, cooling helps the interior finish setting and prevents a gummy texture.
Once cooled, slice the loaf and enjoy the crisp crust, soft interior, and wonderful combination of garlic and herbs.
Preparation Methods
Method 1: Traditional no-knead sourdough
This is the easiest method for beginners. Mix the ingredients, allow the dough to ferment, shape it, proof it, and bake it in a covered pot.
The long fermentation allows the dough to develop flavor and structure without intensive kneading.
Method 2: Stretch-and-fold technique
For a slightly stronger dough structure, perform several gentle stretch-and-folds during the early fermentation stage.
This method helps organize the gluten network and can improve the loaf’s ability to hold its shape.
Method 3: Overnight refrigerated fermentation
After shaping, place the covered loaf in the refrigerator if it is sufficiently fermented and ready for the final proof.
The cool environment slows fermentation and provides flexibility for baking the following day. It may also contribute to a more developed sourdough flavor.
Method 4: Garlic-infused olive oil
For a more rounded garlic flavor, gently warm the minced garlic in olive oil and allow it to cool before mixing it into the dough.
This can soften garlic’s sharpness and distribute its flavor throughout the loaf.
Always cool the garlic oil completely before incorporating it into the dough.
The History of Sourdough Bread
Sourdough is one of the oldest known methods of leavening bread. Long before commercial baker’s yeast became widely available, bakers relied on naturally occurring wild yeasts and lactic acid bacteria present in flour, water, and the surrounding environment.
When flour and water are combined and regularly refreshed, these microorganisms can develop into a sourdough starter. The wild yeasts produce carbon dioxide, which helps the dough rise, while lactic acid bacteria contribute to its characteristic tangy flavor.
Sourdough bread has been prepared in many parts of the world for centuries. Different regions developed their own styles according to local grains, climate, baking traditions, and available ingredients.
Garlic and herbs have also been used for generations to flavor bread, oils, and other traditional foods. Combining them with sourdough is a modern variation on these longstanding culinary traditions.
Today’s home bakers appreciate no-knead sourdough because it combines traditional fermentation with a simple preparation process. A hot covered baking pot can help reproduce some of the crust development associated with professional bread ovens.
This Garlic and Herb Sourdough Bread brings these traditions together in one flavorful loaf that is both rustic and versatile.
Benefits of Homemade Garlic and Herb Sourdough Bread
1. A satisfying homemade staple
Bread provides carbohydrates, which are an important source of energy. A homemade loaf also allows you to control the ingredients and adjust the flavor to your preferences.
2. Naturally fermented flavor
Sourdough fermentation produces acids and aromatic compounds that give the bread its distinctive taste.
Depending on the flour, fermentation conditions, and recipe, sourdough fermentation may also reduce some fermentable carbohydrates and alter the availability of certain nutrients. However, the effects vary, and sourdough is not automatically suitable for everyone with digestive conditions.
3. Garlic adds flavor
Garlic contributes a savory taste that can make bread delicious without relying on large amounts of added salt or rich toppings.
Garlic contains sulfur-containing compounds, including allicin-related compounds, that have been studied for potential biological effects. However, the amount present in a slice of baked bread is not a medical treatment and should not be expected to prevent or cure disease.
4. Herbs bring aroma and variety
Rosemary, parsley, and thyme provide natural fragrance and flavor. They also contain various plant compounds, although the quantities in an individual serving are relatively small.
Fresh herbs can make a simple loaf feel special without requiring complicated ingredients.
5. Control over ingredients
Preparing bread at home lets you choose the flour, adjust the salt, select your herbs, and avoid ingredients you prefer not to use.
You can also experiment with whole-wheat flour for additional fiber, although replacing too much bread flour may make the loaf denser and change its hydration requirements.
6. A versatile addition to meals
This bread pairs well with soups, salads, vegetables, eggs, and protein-rich dishes. Serving it alongside a balanced meal can make lunch or dinner more satisfying.
A nutritional reminder: This bread still contains carbohydrates and gluten when made with ordinary wheat flour. Sourdough fermentation does not make conventional wheat bread gluten-free. People with celiac disease must use appropriately certified gluten-free ingredients and a suitable gluten-free recipe.
Nutritional Information
The following is a rough estimate for one slice, assuming the loaf is divided into 12 similar slices.
- Calories: approximately 170–200
- Carbohydrates: approximately 32–38 g
- Protein: approximately 5–7 g
- Fat: approximately 2–4 g
- Fiber: approximately 1–2 g
- Sodium: varies according to the salt used
These figures are estimates, not laboratory measurements. Actual nutrition will vary with the flour, amount of olive oil, slice size, and moisture lost during baking.
Tips for the Best Garlic and Herb Sourdough Bread
Use an active starter. A weak or inactive starter can make fermentation slow and unpredictable.
Measure ingredients by weight. A kitchen scale provides more consistent results than measuring flour by volume.
Do not rush fermentation. Watch the dough’s appearance and texture rather than relying only on the clock.
Keep the garlic finely chopped. Smaller pieces distribute more evenly and are less likely to create large gaps in the crumb.
Cool cooked garlic oil completely. Warm oil can affect the dough temperature and interfere with consistent fermentation.
Avoid excessive flour during shaping. Too much extra flour can make the dough dry and difficult to handle.
Preheat the Dutch oven properly. A thoroughly heated pot encourages good oven spring and crust development.
Let the loaf cool. Cutting too early can make the crumb appear sticky or underbaked.
Serving Suggestions
Garlic and Herb Sourdough Bread is delicious in many different ways.
- With soup: Serve warm slices with tomato soup, vegetable soup, or creamy mushroom soup.
- With pasta: Pair it with spaghetti, lasagna, or creamy garlic Parmesan pasta.
- As an appetizer: Serve slices with olive oil and a little balsamic vinegar.
- For sandwiches: Use the bread for grilled vegetable, chicken, cheese, or roasted turkey sandwiches.
- With breakfast: Enjoy toasted slices with scrambled eggs or an omelet.
- As garlic toast: Brush slices lightly with olive oil and toast them until crisp.
- With salads: Serve alongside a fresh tomato, cucumber, and lettuce salad.
- For a cheese board: Pair thin slices with suitable cheeses, olives, and roasted vegetables.
For an extra-special presentation, slice the bread, brush lightly with olive oil, and sprinkle with a little fresh parsley before serving.
Storage Instructions
At room temperature
Allow the bread to cool completely. Store it in a paper bag or a bread box for approximately 2–3 days, depending on the room temperature and humidity.
Avoid sealing warm bread in a plastic bag, as trapped moisture can soften the crust and encourage spoilage.
In the refrigerator
Refrigeration often makes bread stale more quickly, so it is generally not the best choice for short-term storage.
In the freezer
For longer storage, slice the cooled loaf and freeze the slices in a well-sealed freezer-safe bag for up to about 2–3 months for best quality.
You can toast slices directly from frozen or allow them to thaw before reheating.
Reheating
To refresh a larger piece, heat it in a 175°C (350°F) oven for approximately 5–10 minutes. Toast individual slices for a crisp finish.
Discard bread if you notice mold or an unusual smell. Do not simply cut away moldy areas, because mold can spread beyond what is visible.
Common Problems and How to Fix Them
Why did my bread not rise?
Your starter may have been weak, the room may have been too cold, or the dough may not have fermented long enough. Feed the starter regularly and wait until the dough shows clear signs of fermentation.
Why is the inside dense?
Dense bread can result from insufficient fermentation, weak dough structure, or cutting the loaf before it has cooled.
Allow adequate fermentation and cool the loaf fully before slicing.
Why did the loaf spread out?
The dough may have been too wet, insufficiently strengthened, or overproofed. Use accurate measurements, perform gentle folds, and monitor the dough carefully during proofing.
Why is the crust too dark?
Your oven may run hot, or the uncovered baking stage may have lasted too long. Reduce the oven temperature slightly or shorten the uncovered baking time while ensuring the center is fully baked.
Why does my bread taste too strongly of garlic?
Reduce the garlic to two or three cloves next time, or gently cook it in olive oil before adding it to the dough. Roasted garlic is another option for a sweeter, milder flavor.
Frequently Asked Questions
Can I make this bread without kneading?
Yes. The dough develops structure through hydration, fermentation, and optional stretch-and-folds. No intensive kneading is necessary.
Can I use dried herbs instead of fresh herbs?
Absolutely. Use smaller amounts because dried herbs are more concentrated. A useful starting point is approximately one-third of the quantity of fresh herbs.
Can I use roasted garlic?
Yes. Roasted garlic gives the loaf a softer, sweeter flavor. Mash it gently and distribute it through the dough.
Can I make the dough without a Dutch oven?
Yes, although the crust may differ. Use a suitable baking vessel and follow its manufacturer’s safety instructions. A preheated baking stone or heavy baking tray can also work, with a safe method of introducing steam if appropriate.
Can I use all-purpose flour?
Yes, provided it has enough strength to support the dough. Bread flour often produces a chewier texture and a more structured loaf.
Can I make the bread ahead of time?
Yes. You can prepare the dough ahead and refrigerate the shaped loaf once it has fermented sufficiently. Bake it when ready, while keeping an eye on proofing and avoiding overfermentation.
Conclusion
Garlic and Herb Sourdough Bread is a wonderful way to bring the comfort of homemade baking into your kitchen without the effort of traditional kneading. With a handful of everyday ingredients, an active sourdough starter, fragrant herbs, and plenty of patience, you can create a beautiful loaf with a crisp crust and a soft, flavorful center.
The combination of garlic, rosemary, parsley, and thyme makes every slice aromatic and satisfying. Whether you serve it beside a bowl of soup, turn it into crunchy toast, or share it at a family dinner, this bread adds a homemade touch to almost any meal.
Once you become comfortable with the basic method, you can experiment with roasted garlic, different herbs, whole-grain flour, or a touch of grated cheese to create your own signature version.
Homemade bread does not need to be complicated. Sometimes, the simplest ingredients and a little time produce the most memorable results.