Introduction
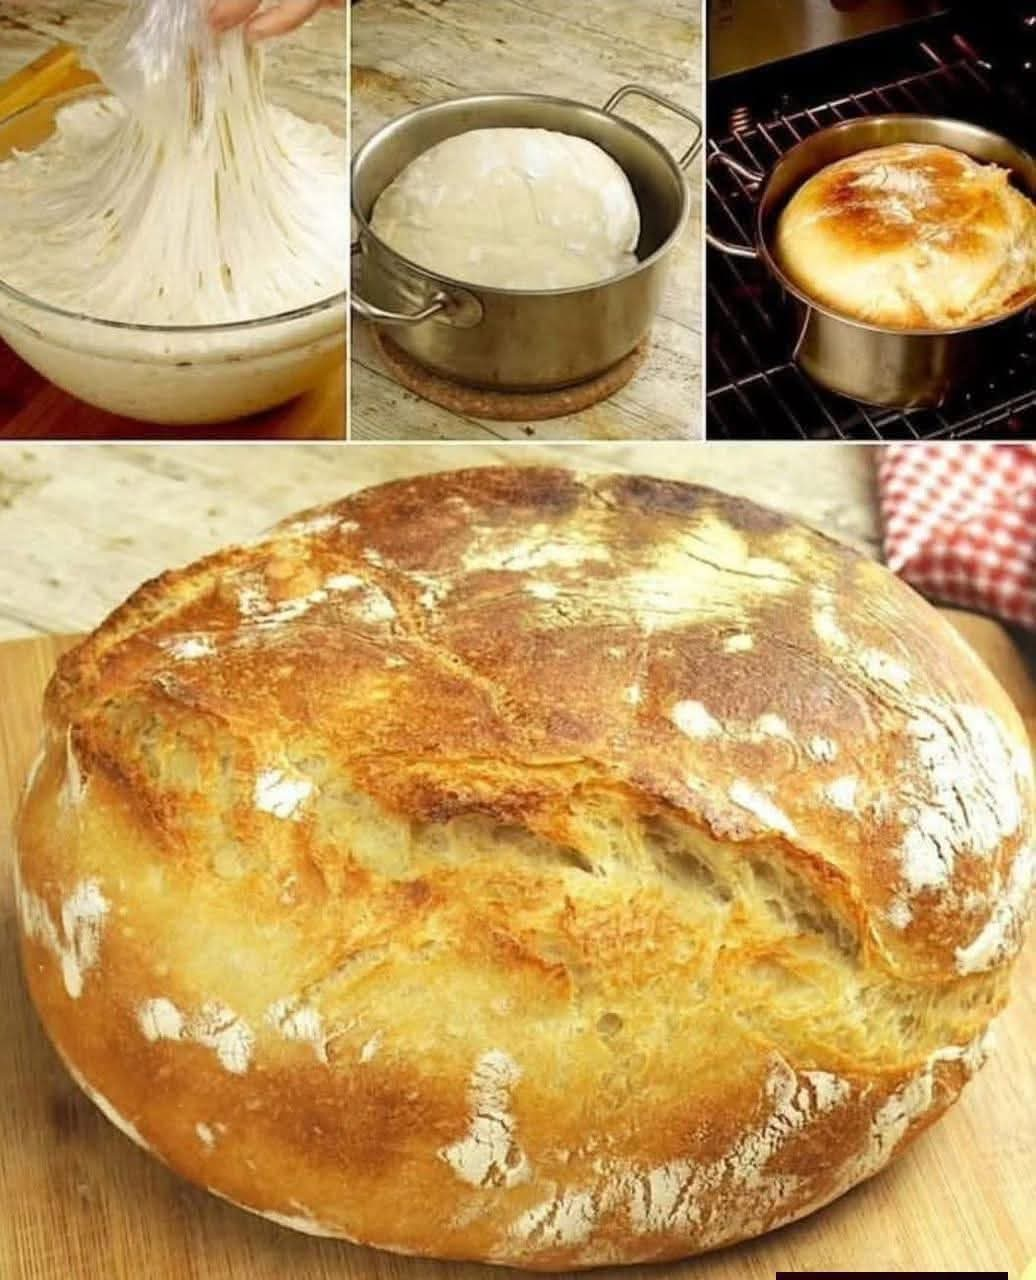
There is something wonderfully satisfying about making bread with your own hands. You don’t need expensive ingredients, special equipment, or complicated techniques. With just flour, water, and salt, you can create a simple, rustic bread with a beautiful crust and a soft, chewy center.
This recipe is perfect when you want fresh homemade bread using ingredients that are usually already in your kitchen. The dough is simple, versatile, and can be baked as a loaf, shaped into smaller breads, or cooked as rustic flatbreads.
The secret is not a long ingredient list—it is giving the dough enough time to hydrate and develop properly.
Recipe Information
Preparation time: 15 minutes
Resting time: 30–60 minutes
Cooking time: 25–35 minutes
Total time: About 1½ hours
Servings: 1 medium loaf
Difficulty: Easy
Ingredients
- 3 cups (375 g) all-purpose or bread flour
- 1½ cups (360 ml) lukewarm water, approximately
- 1 teaspoon salt
Optional
Although the traditional version uses only three ingredients, you can add yeast, herbs, seeds, or oil if you want a different style of bread. For the classic recipe, however, keep it simple with only flour, water, and salt.
Instructions
Step 1: Mix the Flour and Salt
Place the flour in a large mixing bowl. Add the salt and mix well so the salt is evenly distributed.
Step 2: Add the Water
Gradually pour in the lukewarm water while mixing with a wooden spoon or your hands.
Don’t add all the water immediately. Depending on the flour, you may need slightly more or less.
The dough should become soft and slightly sticky but should not look like a liquid batter.
Step 3: Bring the Dough Together
Once the dough has formed, use your hands to bring everything together.
Knead gently for about 5–8 minutes. You are looking for a smooth, elastic dough.
If the dough is extremely sticky, add a small amount of flour. If it feels dry and cracks easily, add a tablespoon of water at a time.
Step 4: Rest the Dough
Cover the bowl with a clean kitchen towel or plastic wrap.
Let the dough rest for 30–60 minutes.
This resting period allows the flour to absorb the water and makes the dough easier to shape.
Step 5: Shape the Bread
Transfer the dough to a lightly floured surface.
Shape it into a round or oval loaf. Try not to add too much extra flour because excessive flour can make the finished bread dense.
Place the shaped dough on a baking sheet lined with parchment paper.
Step 6: Score the Dough
Using a sharp knife, make one or two shallow cuts across the top of the loaf.
These cuts allow steam to escape and help the bread expand while baking.
Step 7: Bake
Preheat your oven to 220°C / 425°F.
Bake the bread for approximately 25–35 minutes, or until the outside is golden brown and sounds hollow when tapped.
For a crispier crust, place a heatproof pan containing a little hot water in the oven during the first part of baking. The steam can help create a beautiful crust.
Step 8: Cool Before Slicing
Remove the bread from the oven and place it on a cooling rack.
Allow it to cool for at least 20–30 minutes before slicing.
Although it may be tempting to cut into it immediately, cooling allows the interior to finish setting.
Preparation Method
The basic method is simple:
Mix → Knead → Rest → Shape → Score → Bake → Cool
The most important part is achieving the right dough consistency. Flour absorbs water differently depending on its type, brand, and humidity, so use the measurements as a starting point and adjust gradually.
For an especially rustic loaf, handle the dough gently after resting instead of aggressively kneading it again.
Tips for Perfect Bread
1. Don’t add too much flour
A slightly sticky dough can produce a lighter and more enjoyable loaf. Adding too much flour can make the bread heavy.
2. Use lukewarm water
Very cold water slows hydration, while extremely hot water can negatively affect dough structure.
3. Let the dough rest
Resting gives the flour time to absorb the water and makes the dough easier to work with.
4. Preheat the oven completely
A properly heated oven gives the bread a stronger initial rise and helps create a better crust.
5. Don’t slice immediately
Allowing the loaf to cool helps prevent a gummy interior.
History of Simple Bread
Bread is one of the oldest prepared foods in human history. Early breads were often made from simple mixtures of ground grains and water and cooked on hot stones or other heated surfaces.
Long before modern bakeries, people discovered that combining flour with water could create a dough that could be transformed into a filling and practical food.
Salt eventually became an important ingredient for flavor and preservation.
Although today’s bread recipes can contain many ingredients, the fundamental combination of flour and water remains at the heart of countless traditional breads around the world.
Benefits of Homemade Bread
Homemade bread can have several practical advantages.
- You control the ingredients.
- You can avoid unnecessary additives.
- Fresh bread can be customized to your preferred texture.
- It is inexpensive to prepare.
- It can be served with sweet or savory foods.
- Making bread at home can reduce reliance on packaged bread.
Flour also provides carbohydrates, which are an important source of energy. However, the nutritional value depends greatly on the type of flour used. Whole-grain flour generally provides more fiber and micronutrients than refined white flour.
Formation and Texture
The formation of this bread comes from the interaction between flour and water.
When flour is hydrated and worked, proteins in the flour can form gluten, creating an elastic network that helps the dough hold its shape.
During baking, the water turns into steam, the dough sets, and the surface develops its characteristic golden-brown crust.
The result is a rustic bread with a crisp exterior and a satisfying interior.
Serving Suggestions
This bread is incredibly versatile.
Serve it with:
- Butter
- Olive oil
- Honey
- Jam
- Cheese
- Eggs
- Soup
- Stews
- Roasted vegetables
- Grilled meats
- Fresh tomatoes
- Avocado
You can also slice leftover bread and toast it for breakfast or use it to make sandwiches.
Storage
Once completely cooled, store the bread in a paper bag or bread container at room temperature for about 1–2 days for the best texture.
For longer storage, slice the bread and freeze it in an airtight freezer-safe bag.
When needed, simply toast or warm the slices.
Common Problems and Solutions
Bread is too dense
The dough may have been too dry, or it may not have had enough resting time.
Bread is too flat
The dough may have been too wet or shaped too loosely.
Crust is too hard
Try reducing the baking time slightly or allow the bread to cool under a clean kitchen towel.
Inside is gummy
The bread may have been underbaked or sliced while still very hot. Allow it to cool completely before cutting.
A Simple Homemade Bread to Love
There is a special kind of satisfaction that comes from taking three ordinary ingredients and turning them into something warm, fragrant, and delicious.
This bread doesn’t require complicated equipment or an expensive shopping list. It is simple, economical, and adaptable—and that’s exactly what makes it so wonderful.
Conclusion
This 3-ingredient homemade bread proves that delicious bread doesn’t always require a long list of ingredients.
With just flour, water, and salt, plus a little patience, you can make a rustic loaf with a golden crust and a soft, satisfying texture.
Once you master this basic recipe, you can experiment with different flours, shapes, baking techniques, and optional additions to create your own favorite homemade bread.